Using the File Management Window
I. Search
The File Management Window allows you to see and manage all of your orders.
When you create or import an order, it will appear in this list.
The software allows you to search through the orders so you can find what you’re looking for quickly.
Simply enter the search criteria in the search box or enter the date range needed.
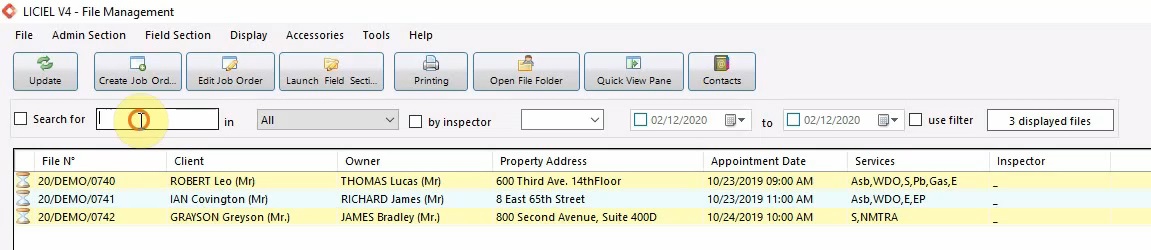
Then make sure the “Search for” checkbox is checked.
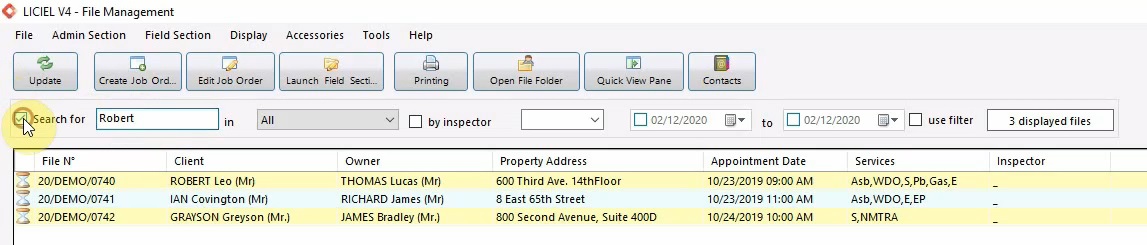
Then, click the “Update” button to see an updated list.

If you want to see the list in its entirety without any filters, simply uncheck the “Search for” checkbox and click “Update”.
II. Ribbon
The File Management Window has a ribbon with several options.
Along with the “Update” button, the ribbon is home to several other actions, including “Create or Edit a Job Order”, “Launch the Field Section”, “Print”, and “Quick View Pane”.

III. Quick View Pane
Click the “Quick View Pane” to view a preview of the selected order.

Until an inspection is selected from the list, the Preview Pane will be empty.
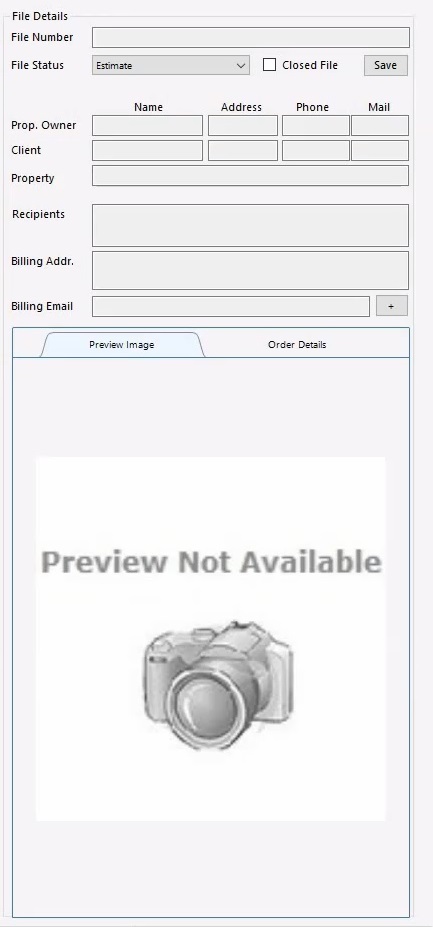
Once you click on an inspection from the list, you will see details about that file including Client and Owner Information.
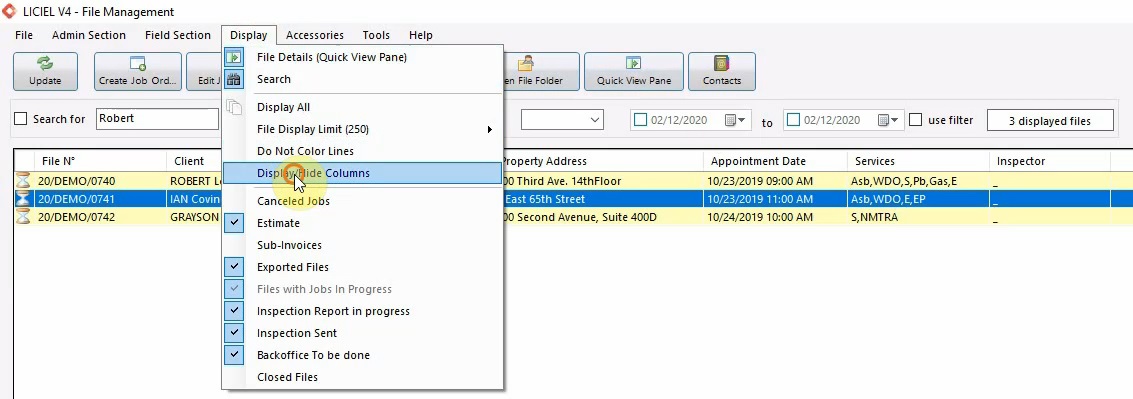
IV. Display
At the very top, click the “Display” Tab to view the rest of the display options.
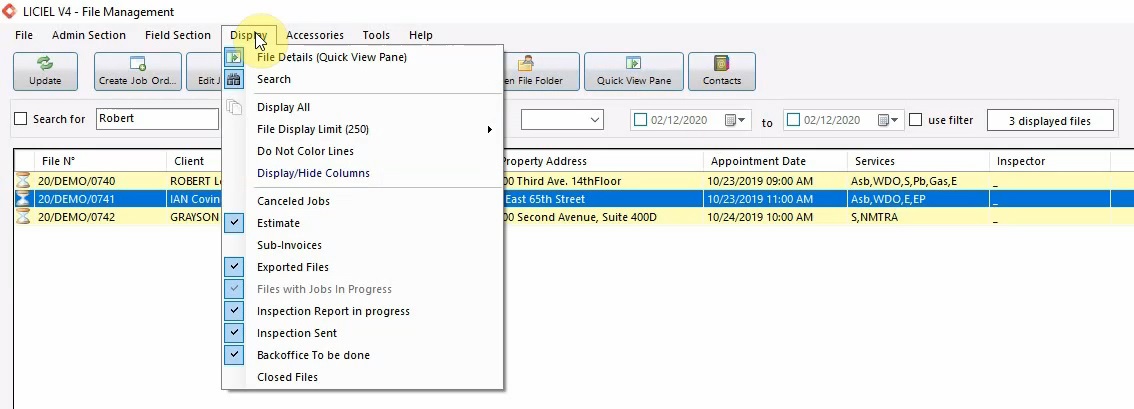
From here, you can toggle the Quick View Pane and the Search Box.
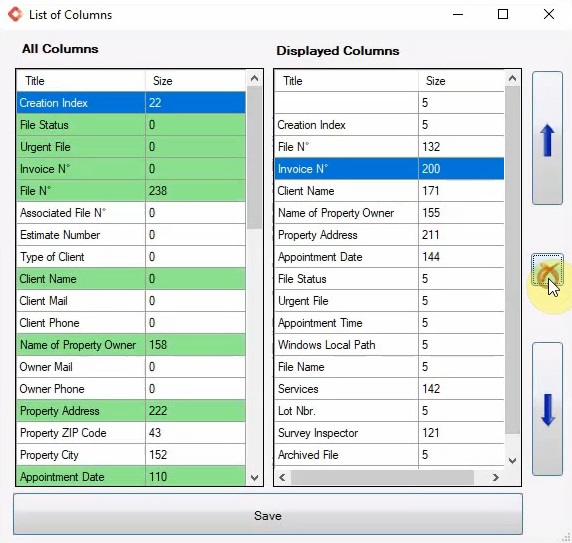
You can also display “All” the orders and choose which columns will be visible in the File Management Window.
Click "Display / Hide Columns".
To display a new column, select the column you want to add on the left side and drag it to the right side.
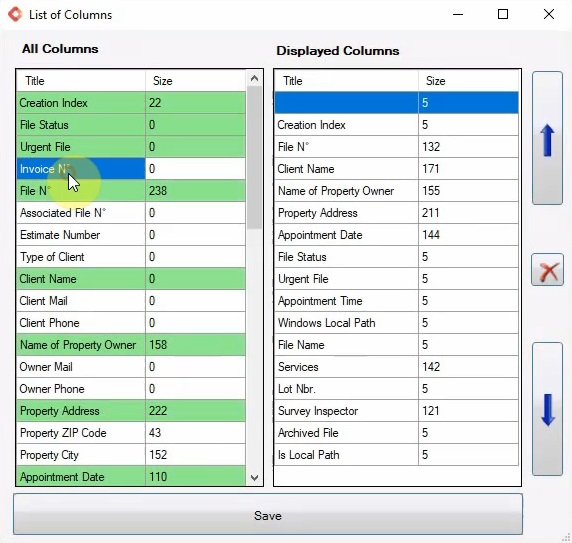
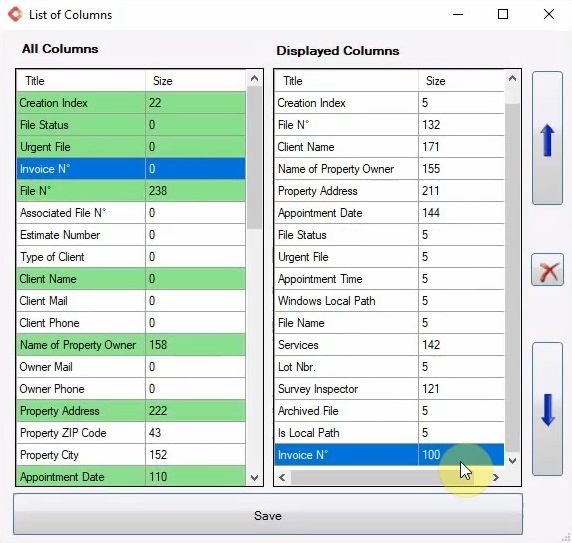
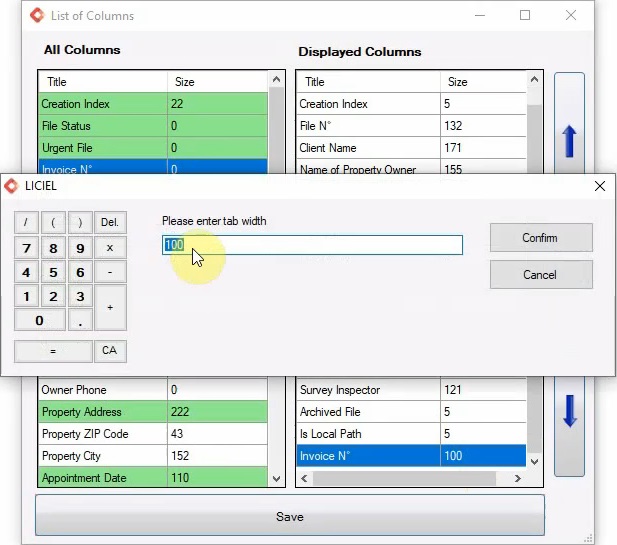
You can change the width of the column by double clicking the size cell for that column.
Use the arrows on the side to change the order of the columns.
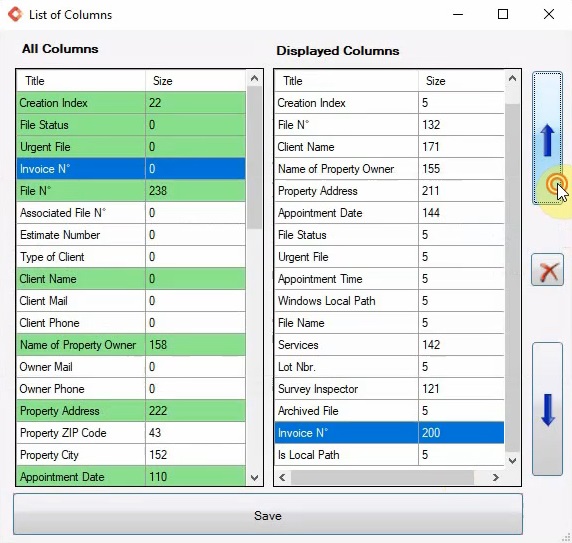
To remove a column, select the column that you want to hide, and then click the “X” button.
With a good understanding of the File Management Window, you are ready to create an order!