LICIELWeb Article - BackOffice
Summary
- 0. Connection and pre-requisites
- I. General presentation
- II. Details and functions
- III. Contacts
- IV. List of Files
- V. Calendar
- VI. Extranet
- VII. Complements
- VIII. Tools
- VIII. 1. LICIELWeb Parameters
- VIII. 2. Logo and footers
- VIII. 3. Users
- VIII. 4. Accounting / RIB-IBAN - Numbering - Prices - Contacts
- VIII. 5. Backup
- VIII. 6. Appearance
- VIII. 7. Email (SMTP Configuration)
- VIII. 8. SMS / Tours
- VIII. 9. Templates (Mails / SMS / Reports)
- VIII. 10. Cloud settings
- VIII. 11. Mobile Application Settings
- VIII. 12. Extranet settings
- VIII. 13. Database
- IX. Help
0. Connection and pre-requisites
To connect to your professional space, use the following link http://xxxxxx.liciweb.com/login-back.
You must replace "xxxxxxxx" by your subdomain name
In order for LicielWeb to function correctly with Liciel Diagnostics V4, the business software must be installed on the c:// and the WEBDAV application installed.
"C: \ LICIEL_Programmes \ LICIEL Diagnostics".
Be careful if your software is installed in the "C: \ LICIEL_Programmes \ LICIEL Diagnostics EntrepriseA" directory, the web software will not be able to open V4.
Export the settings of a V4 software (diagnostic suite) on the web in order to re-import them on the web software.
This allows you to retrieve the report templates and all information about the company.
Method 1:
When using the V2 cloud for the first time, click on 1) Export your settings to your account
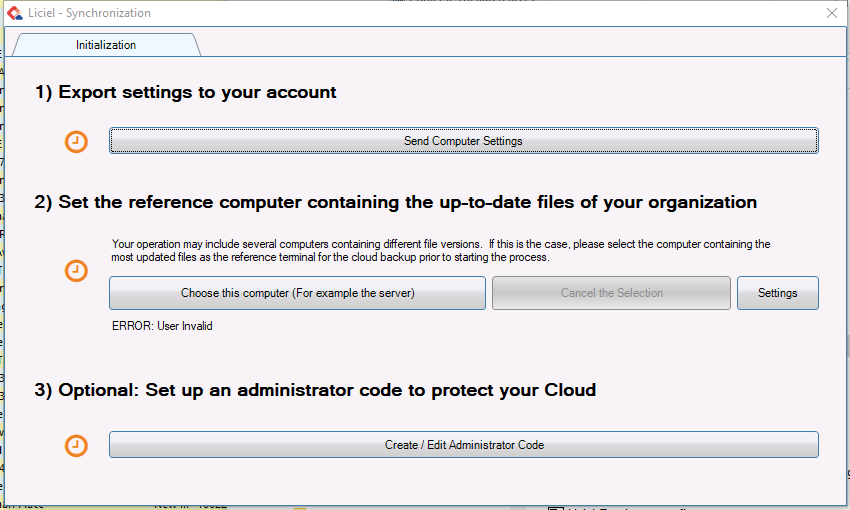
Method 2:
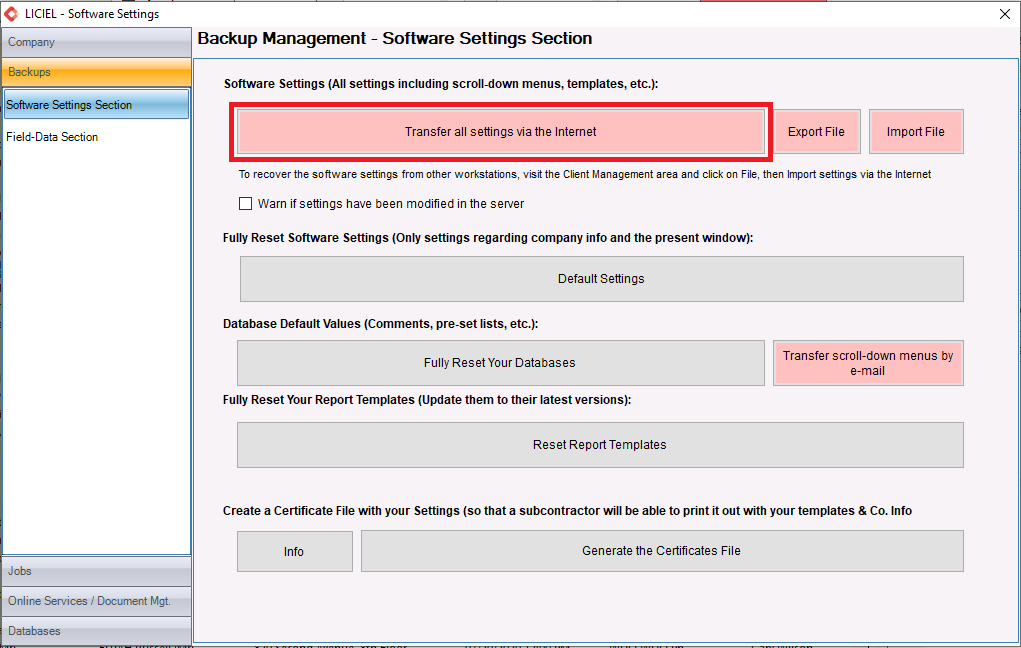
Once the settings have been transferred, import the settings into your BackOffice by going to Tools / Software Settings / Backups Management / Software Settings Section. Click Import into LICIELWeb the settings saved on the internet to import the settings.

I. General presentation
The Liciel BackOffice identically reflects the functioning of Liciel Software by adding Web functionalities and a new visual.
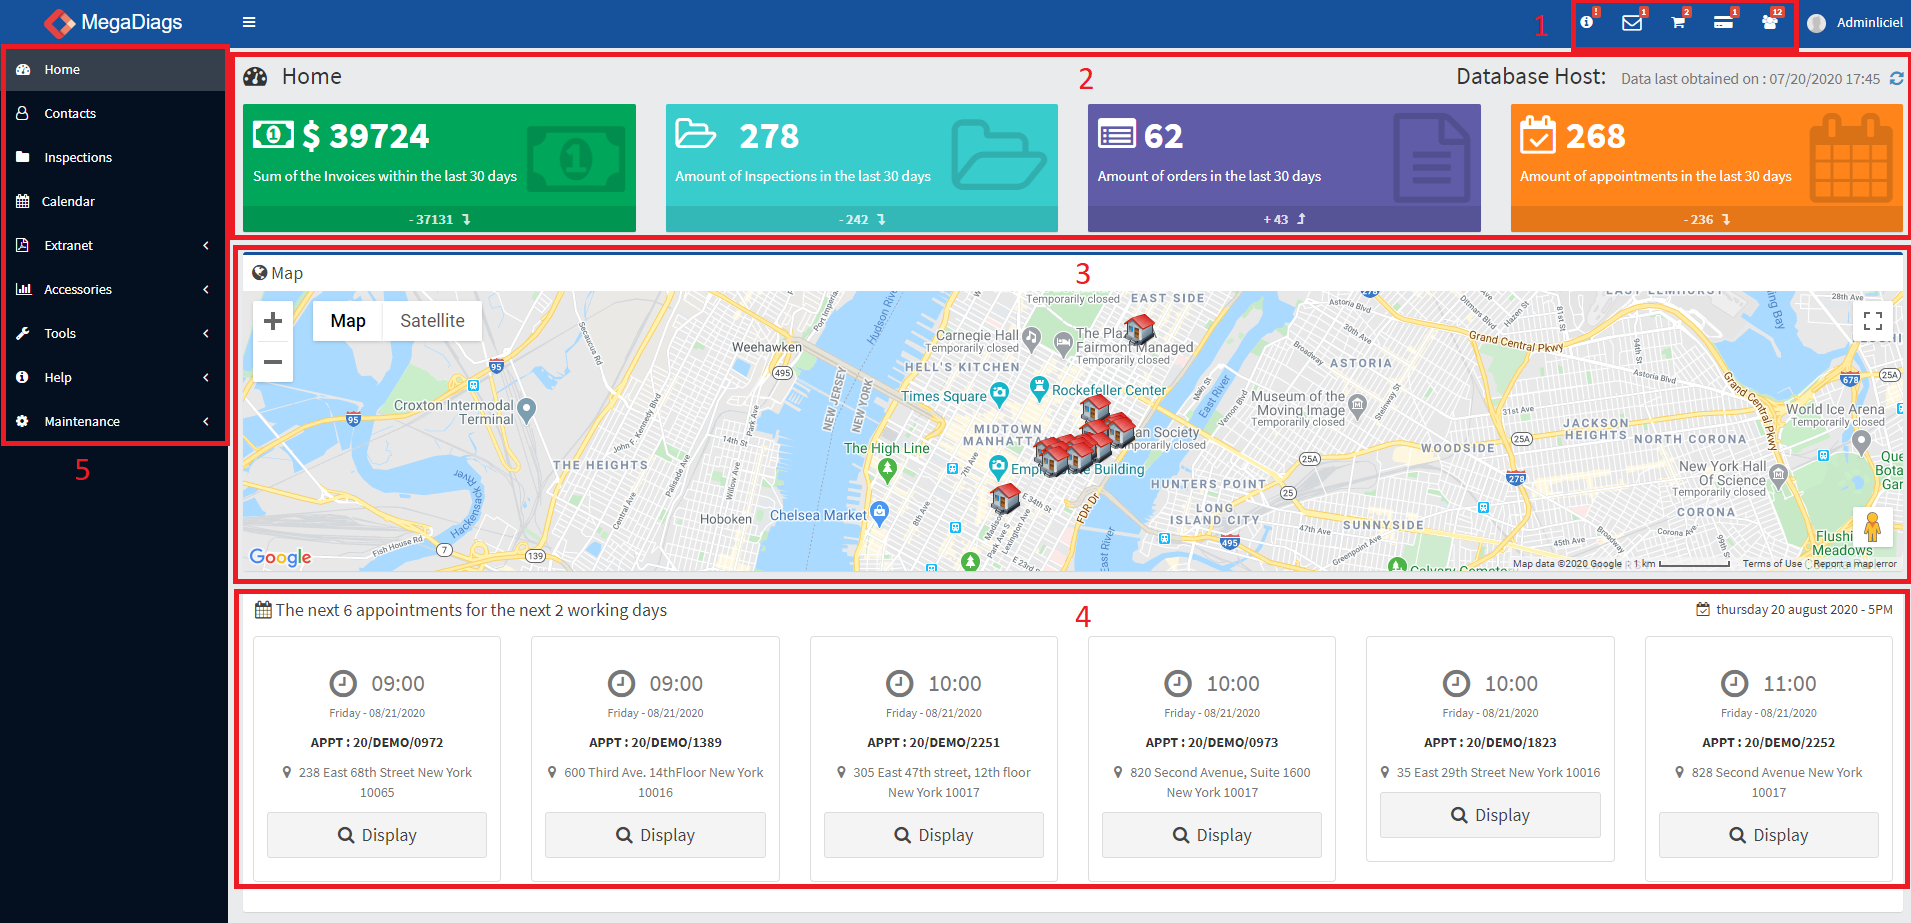
The main page shows you five points:
- Shortcuts and Profile
- Home with quick access links to Invoices, Files, Orders and Planning
- A card with the goods on it
- The next six appointments with the possibility to display them
- The menu to navigate in the different parts and sub-parts
II. Details and functions
II. 1. Shortcuts and profiles

Just click on the shortcuts to go directly to the corresponding pages.
Click on your connection name then on profile to modify the user's data.
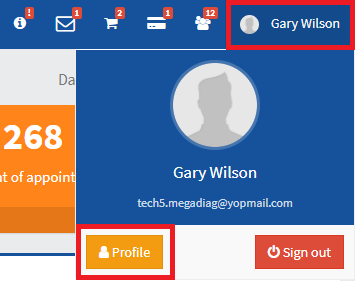
As an administrator, you can change User settings by going to Tools / Software Settings/ Company and clicking Users / Certificates. Modify any users in necessary
Below is the menu to add / modify operators. (see below for details "II. 7.3 Users")
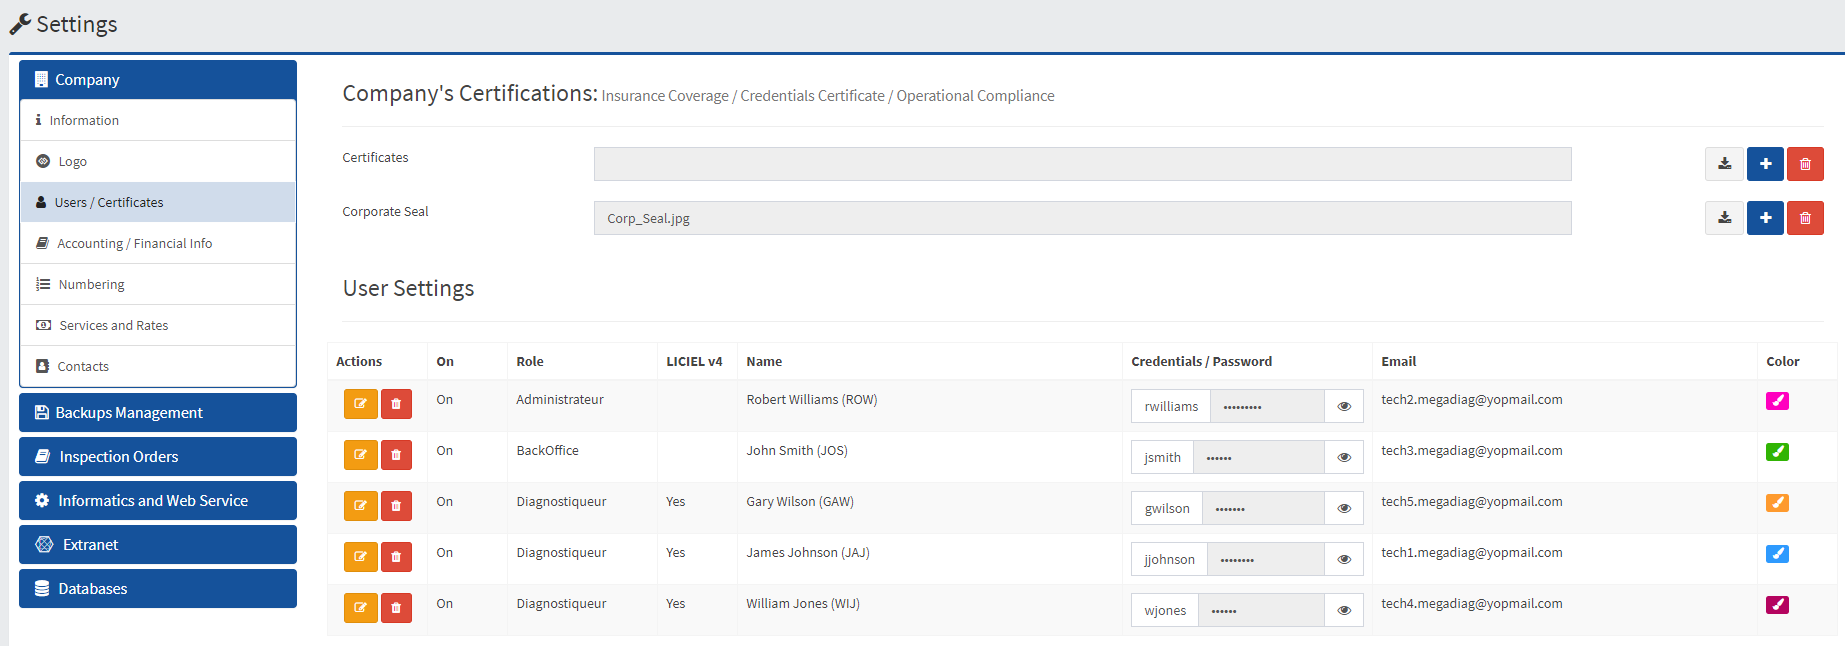
Choose the access and the color to be displayed in the Agenda.
The "QR Code" tab displays the code to be scanned by the mobile application.
The "Customer appointments" tab allows you to specify the days and hours worked for the technician. (Useful for appointments made directly by clients)
II. 2. Home
Home with quick access links to Invoices, Files, Orders and Planning.
This is to allow, at a glance, to have information and to be able to reach the desired page in one click.

II. 3. Map
A card with the goods placed on it.
Click on a property to open its file
II. 4. Appointment
The next six appointments with the possibility of displaying them.

Click on "Display" to view the information as well as the map where the property is located
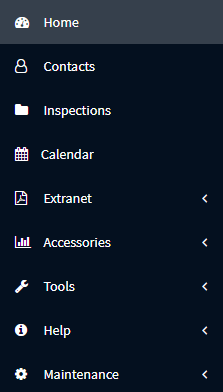
II. 5. Navigation menu
The menu to navigate in the different parts and sub-parts.
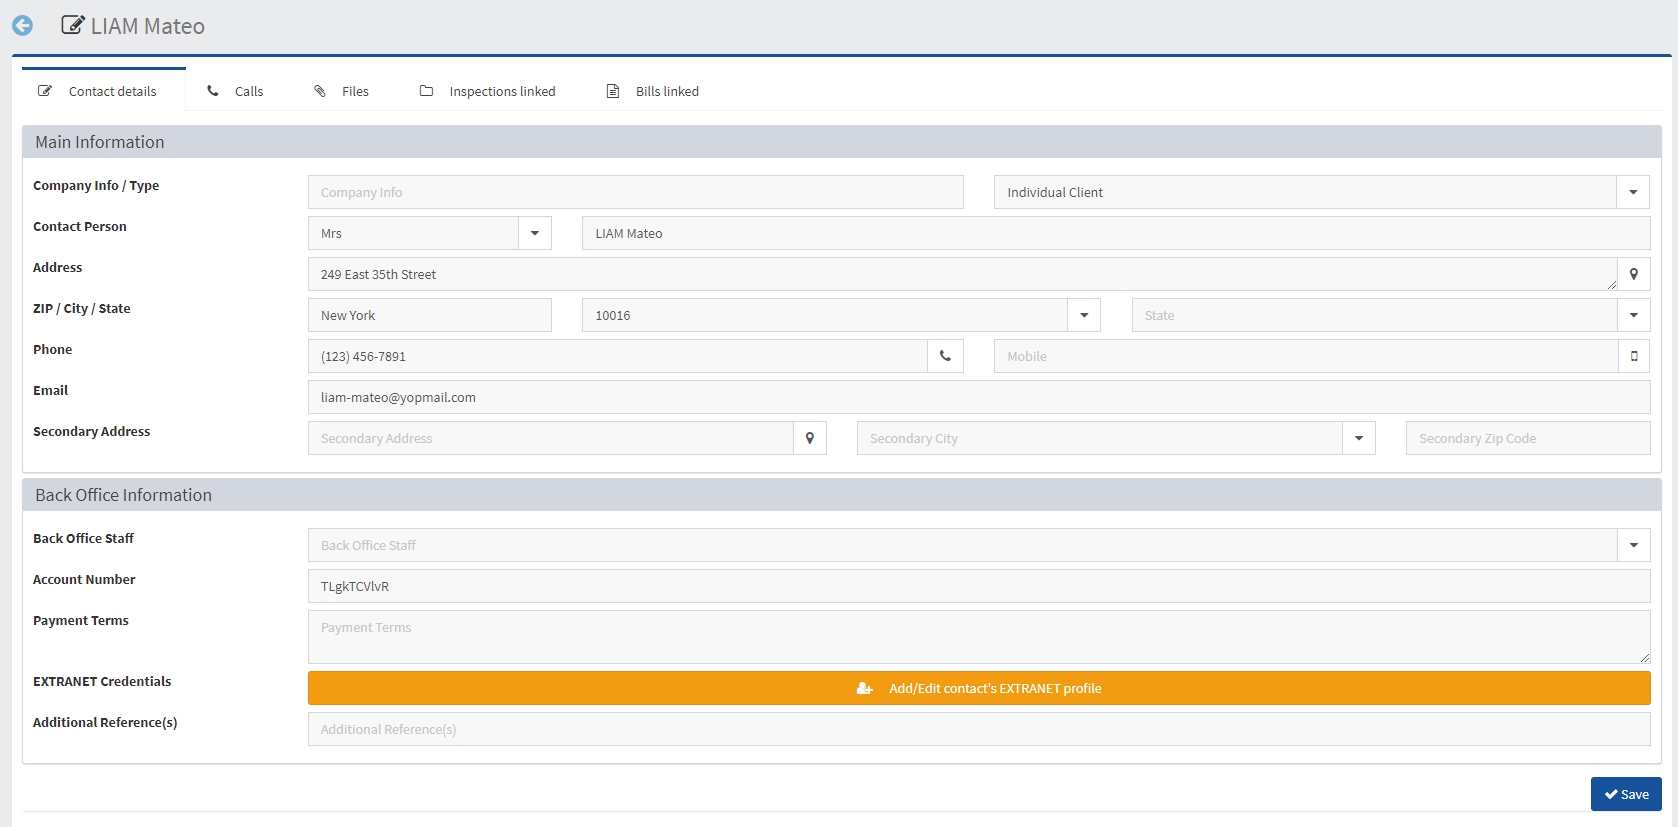
III. Contacts
Click "New" to create a new customer. 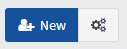 The gear icon is used to modify the columns.
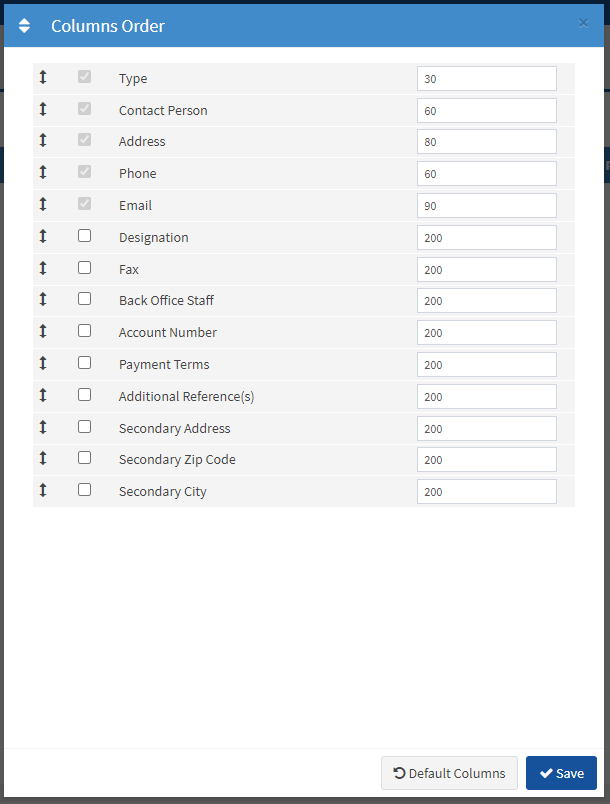
As in the Liciel Software, you have control over the display of columns.
Use the filters to search for a contact or browse the different pages.

Hover over the client type for any contact to see an info bubble for that contact.
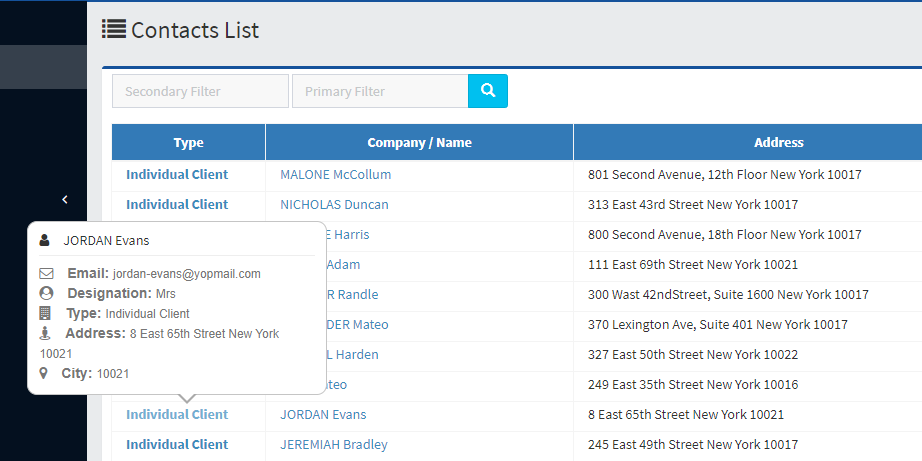
By clicking on the "individual" button, the customer file appears.
IV. List of Files
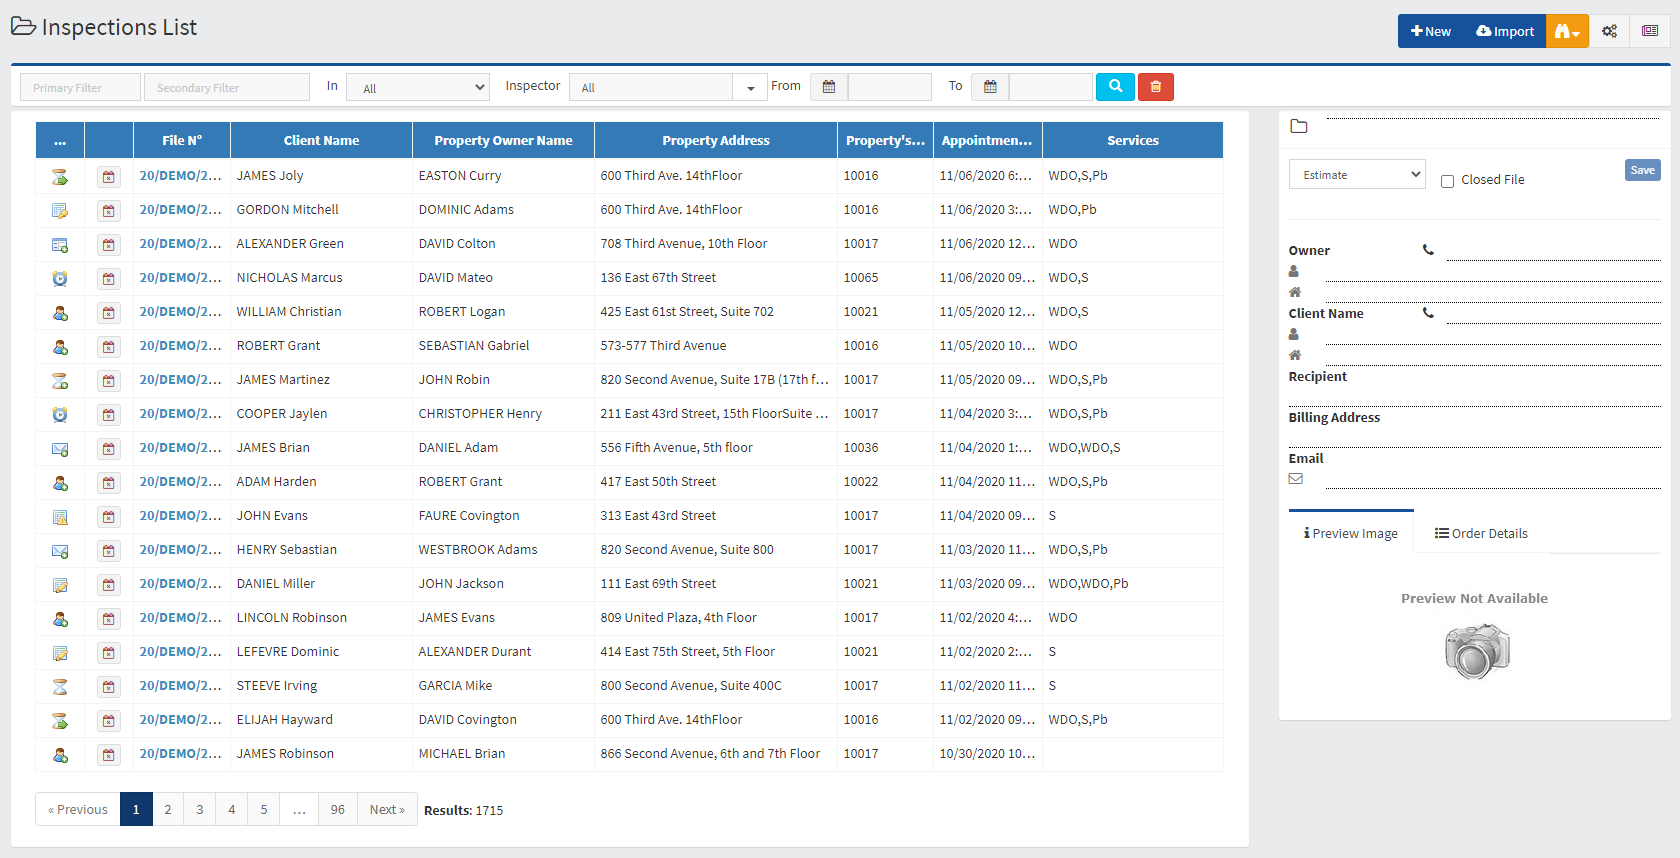
As in the Liciel Software, you have access to the list of files.
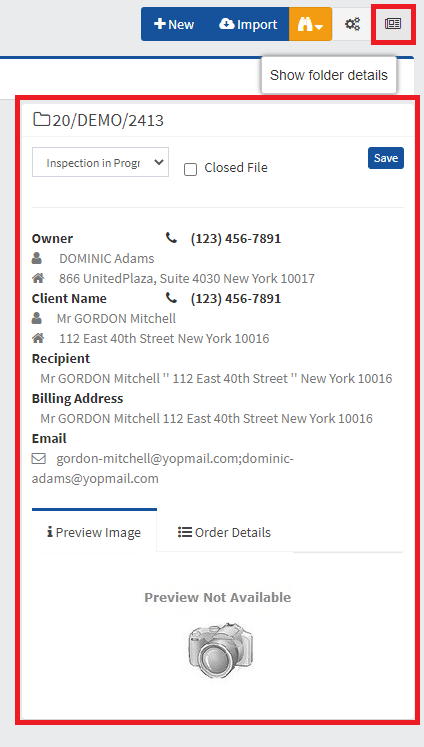
You have five buttons: "New", "Import", "Find", "Change column display," Show / hide folder information "(as below).

Choose a file and click on its file number to open a new page. This page is like Order Management Window in the Liciel Software.
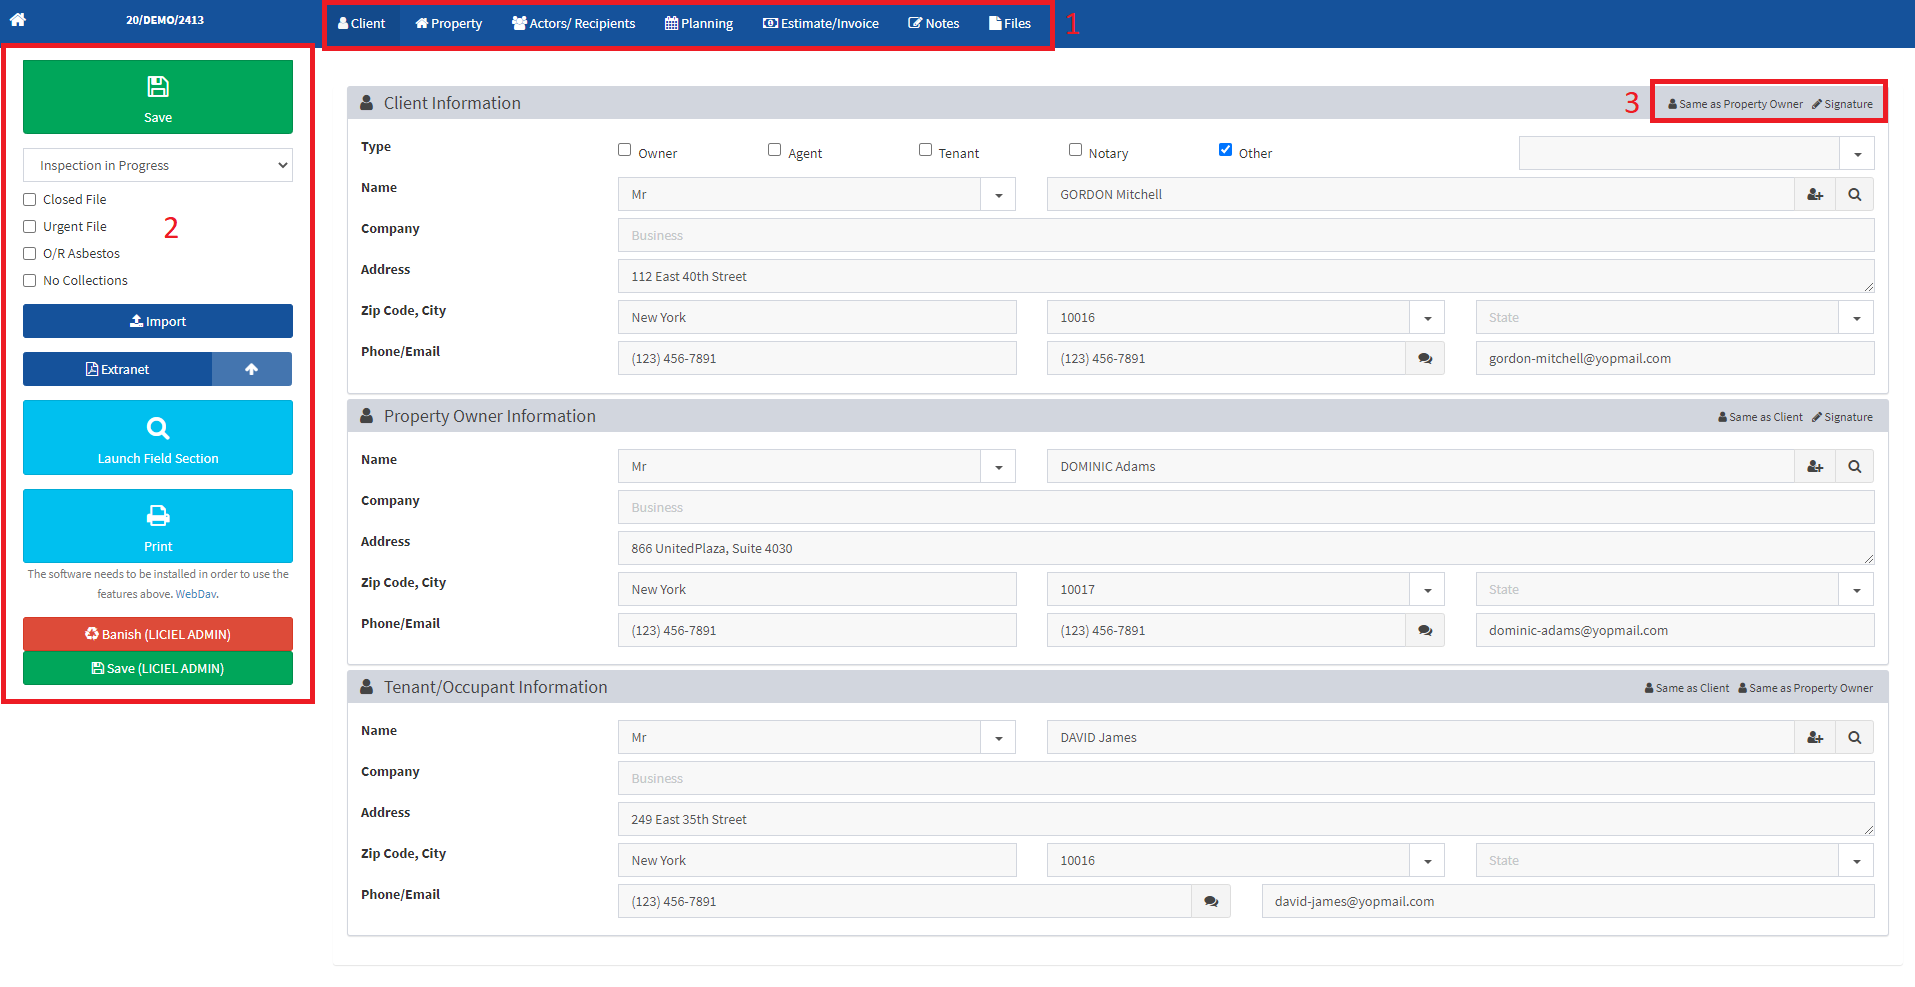
As in Liciel, you have several tabs (1) which allow you to view / fill in (for a file creation), all the administrative information.
In the left side (2), you will find the registration, the status, the import function (which will not take the invoicing of the selected folder) which saves time as the copy paste "Same as" (3), sending to the extranet and printing.
If the V4 software is installed on your computer on the c: /, you can also open the field part.
"C: \ LICIEL_Programmes \ LICIEL Diagnostics".
Requires installation of the WebDav tool. More information on the Manage / Print Reports from the Backoffice
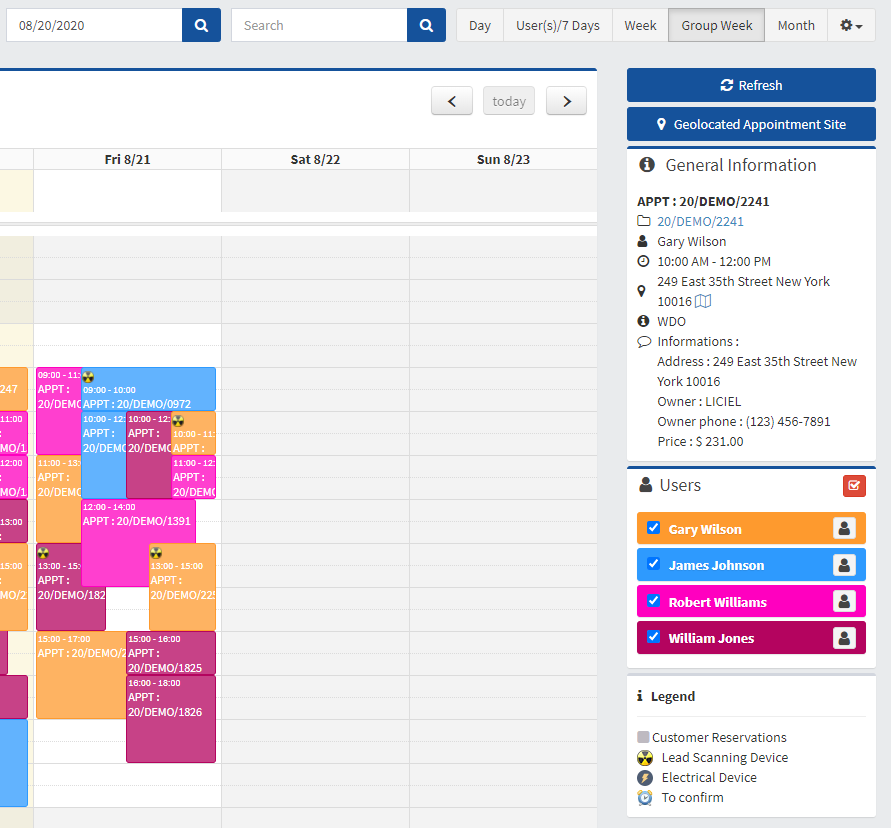
V. Calendar
The Geolocated Calendar. To access the dedicated article, see this page .
Administrator version (visualization of all schedules)
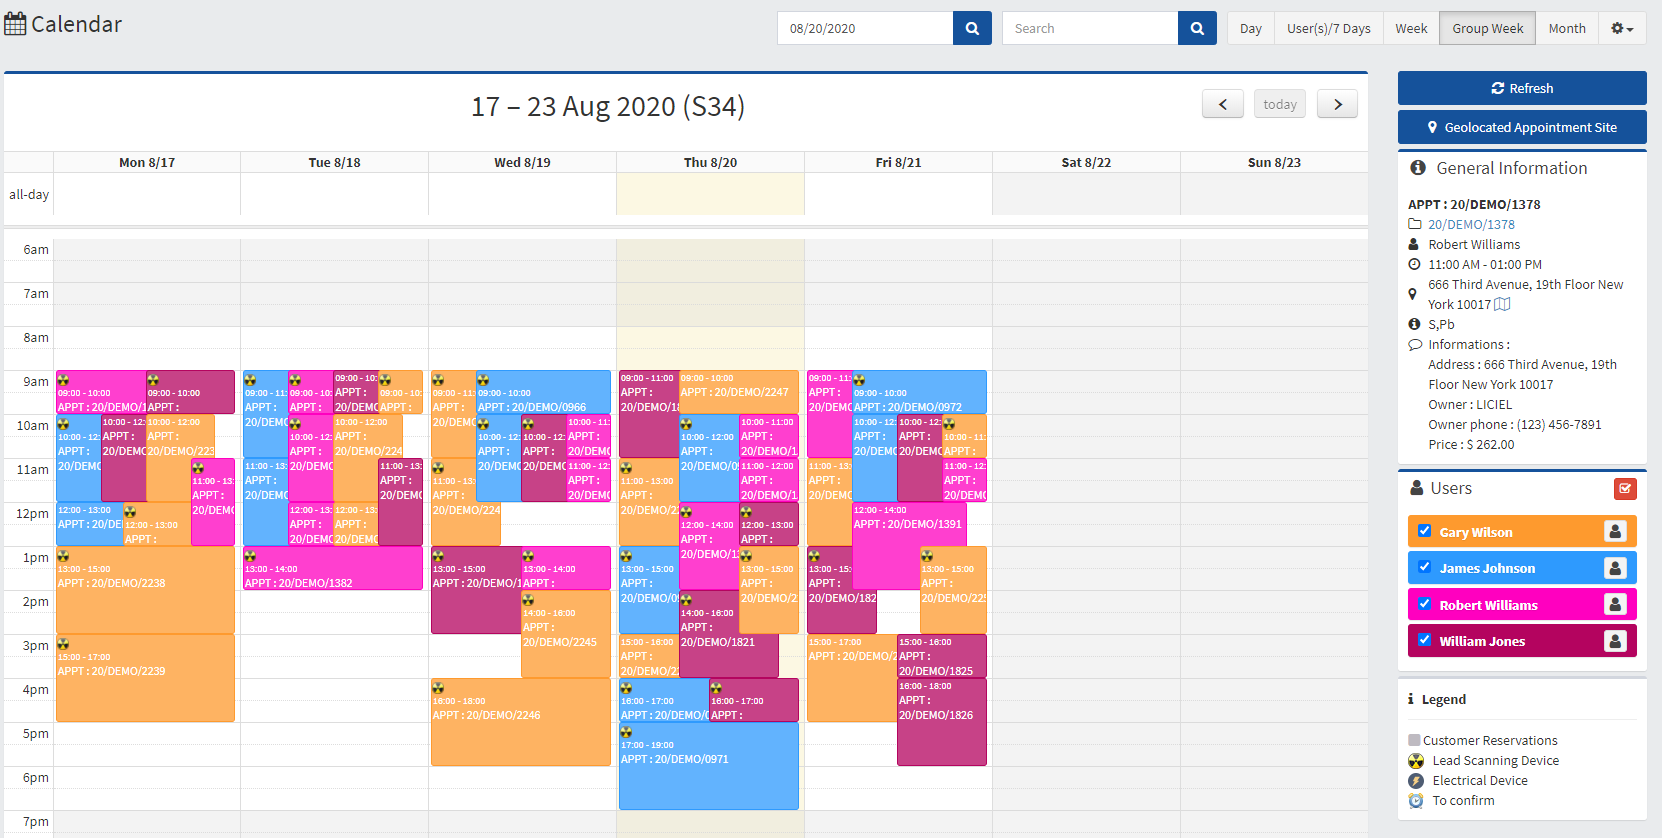
Administrators will have the capability to see all users appointments. Inspectors will only see their own schedule.
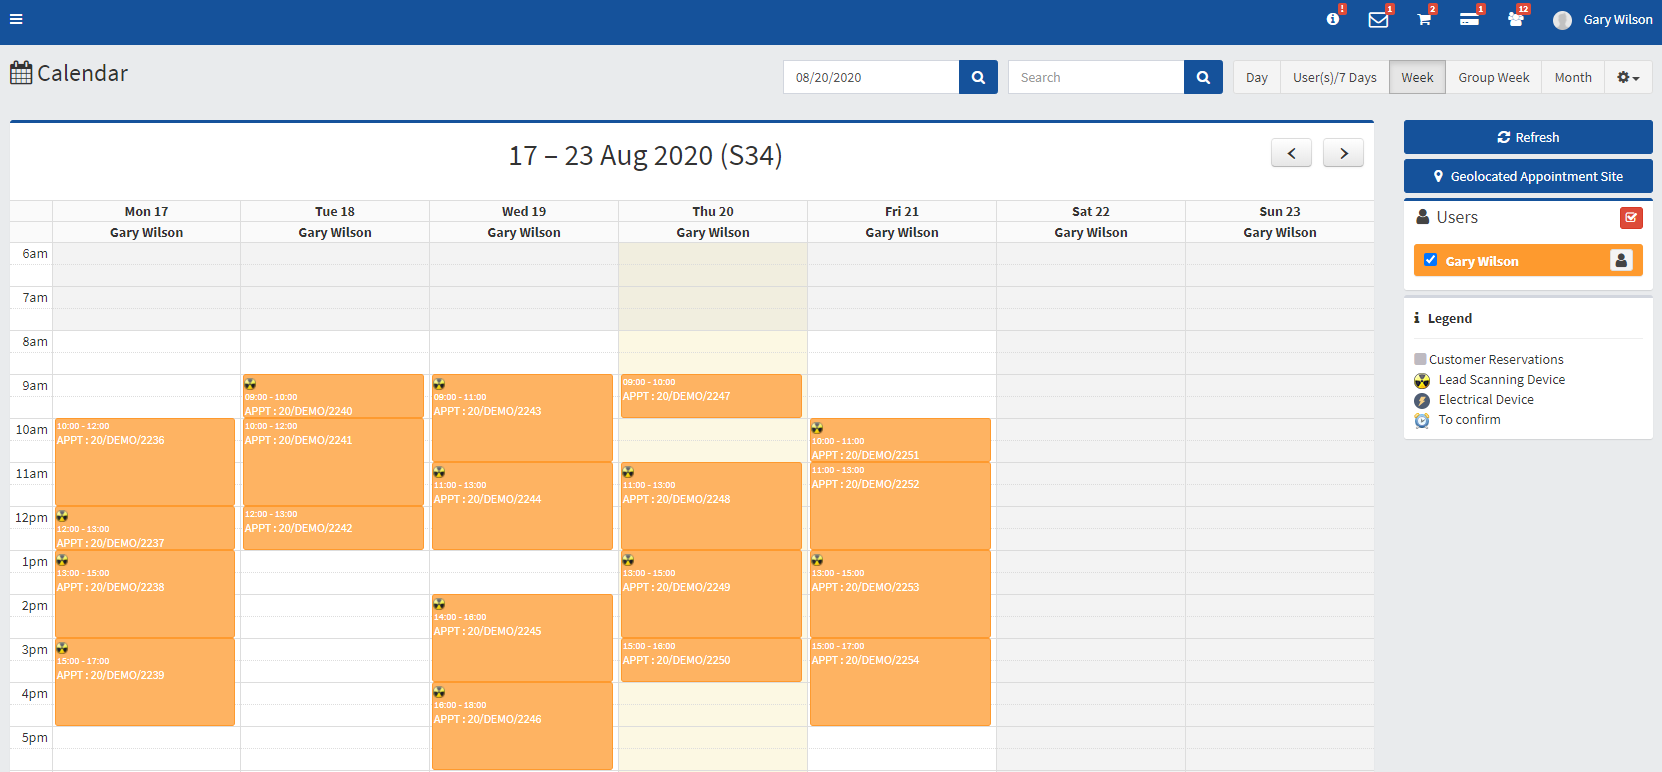
Change the type of calendar by selecting day / week / month

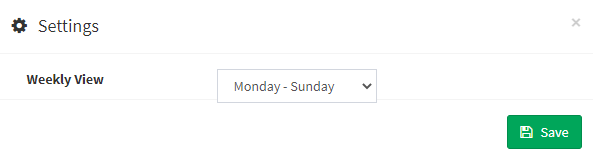
V. 1. Calendar settings
V. 2. Sharing the agenda
See Wikiliciel
Download the days itinerary by clicking the gear icon and selecting Present Day's Route.
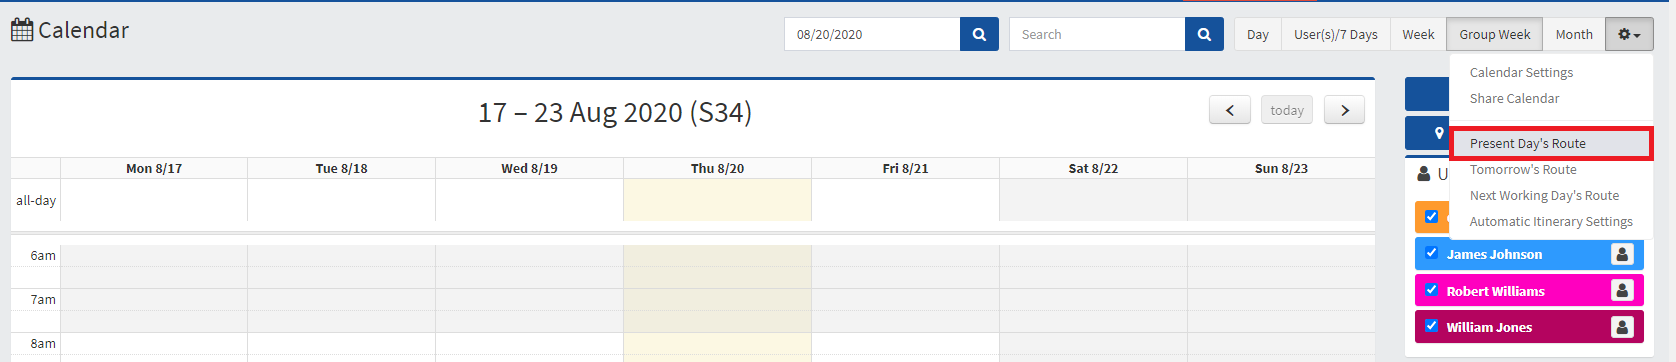
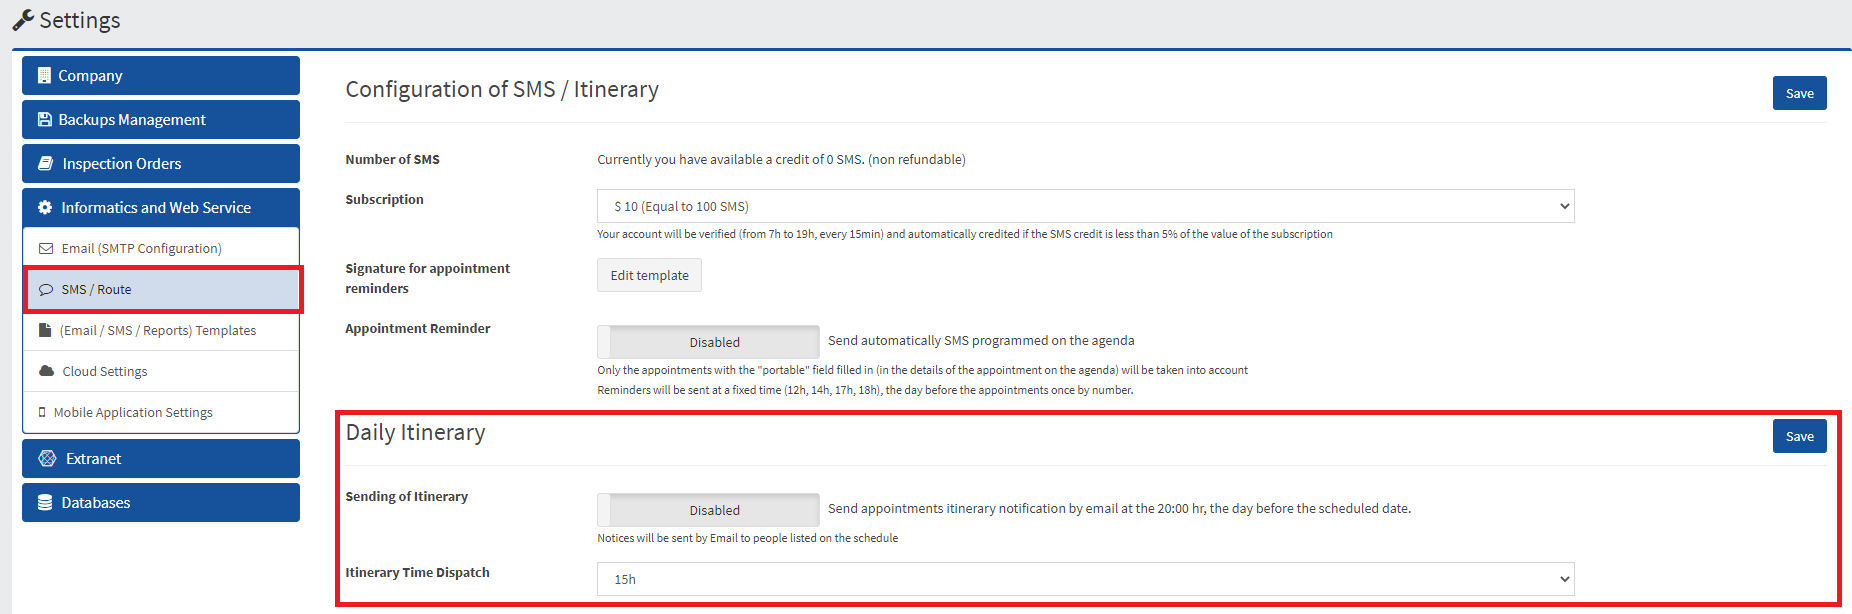
To activate the route reminders for your inspectors, click on Sending of Itinerary.
Back in the Calendar, click on the "Refresh" button to update the agenda with the latest additions and modifications.
The "go to date" filter is used to display the desired day.
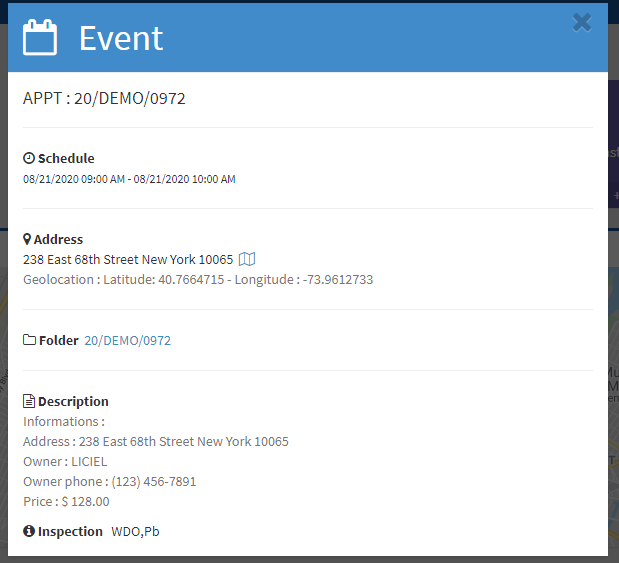
The "General Information" box summarizes the meeting.
The user part allows you to toggle the display for each inspector.
Click on Geolocated Appointment Site to add an event by putting an address, city or postal code.
1- Geolocate the address by clicking on the button Geolocate this address.

2- Click Start the Schedule Assistant. Notice that the appointments are different colors now. The green appointments are located near the location that was just geolocated. The red appointments are farther. The colors will allow you to properly plan the best route. Select the day and time on the planning then fill in the additional information on the page below.
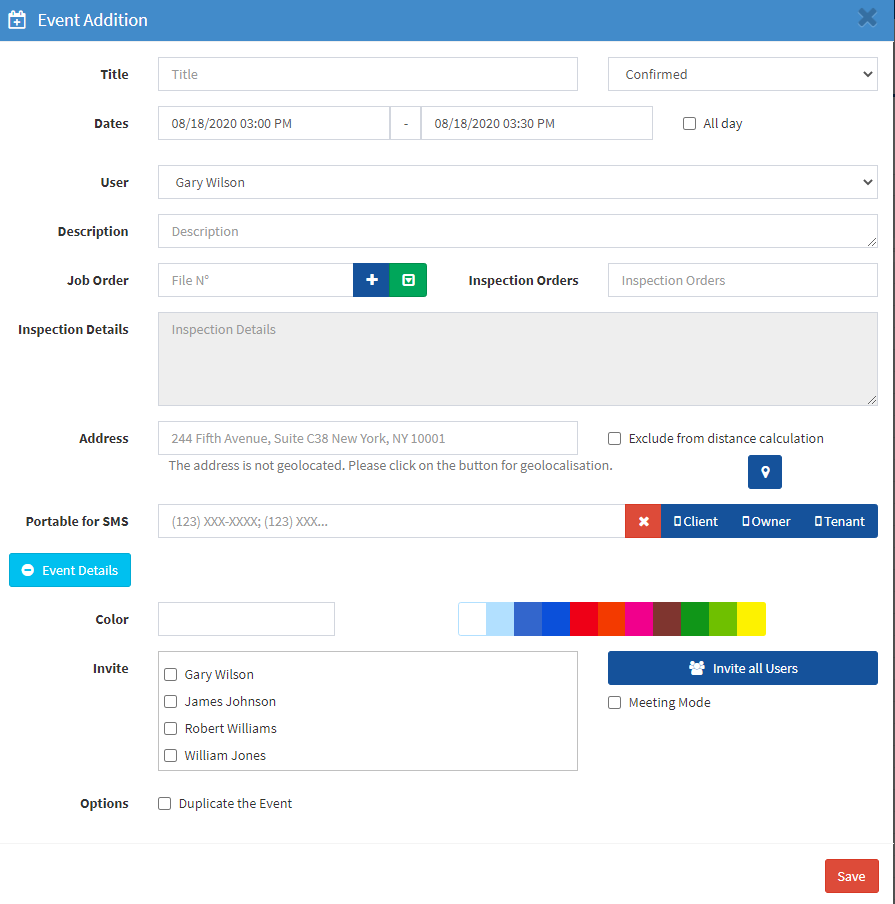
Finally, save the information.
VI. Extranet
VI. 1. Payments
The extranet menu provides a direct link with the document exchange gateway with customers.
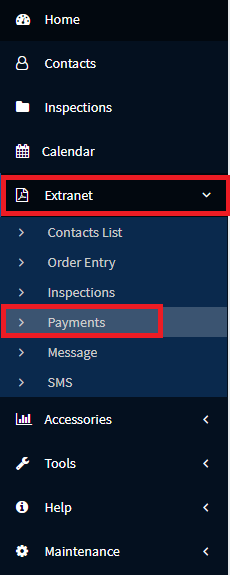
The list of payments displays the payment status. By clicking on the extranet column for that payment, a new page will open the extranet in order to view the file.
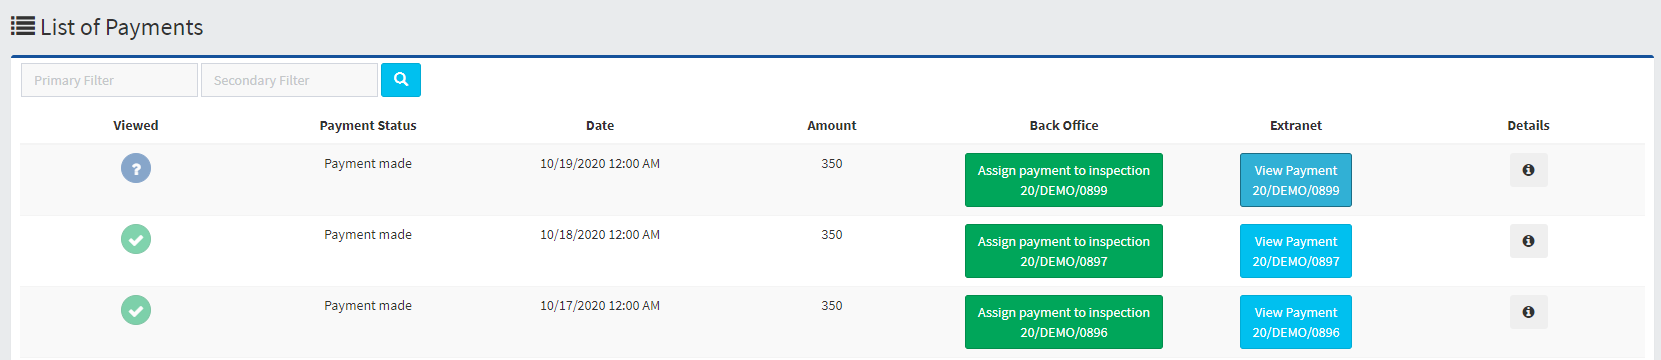
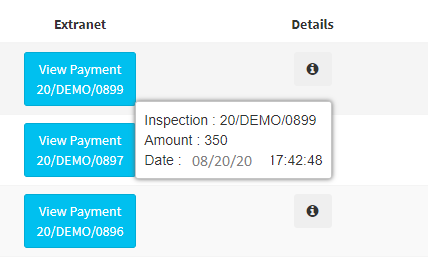
By hovering the mouse over the detail icon, a tooltip is displayed
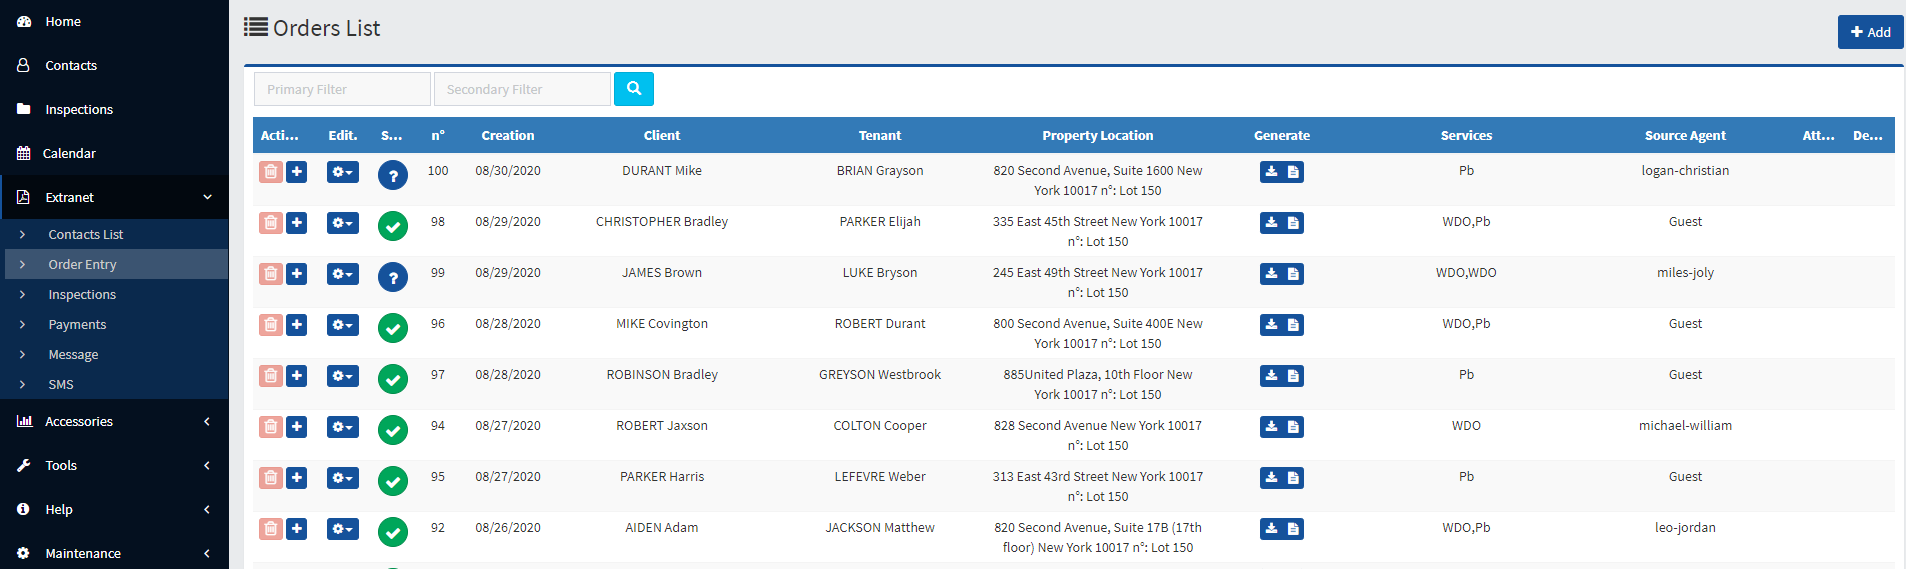
VI. 2. Orders
The list of orders shows you the orders and their status. Below, two contact request for ERP renewal.
Click on the "+" to open it as a mission order.
In the Liciel software, these orders are available for importing through the Online File Sharing Area.

 You can add orders yourself by clicking on Add.
 Download the orders in .liciweb and in .docx.
To configure automatic confirmation / appointment, please consult the dedicated article: Customer deposit and appointment setting
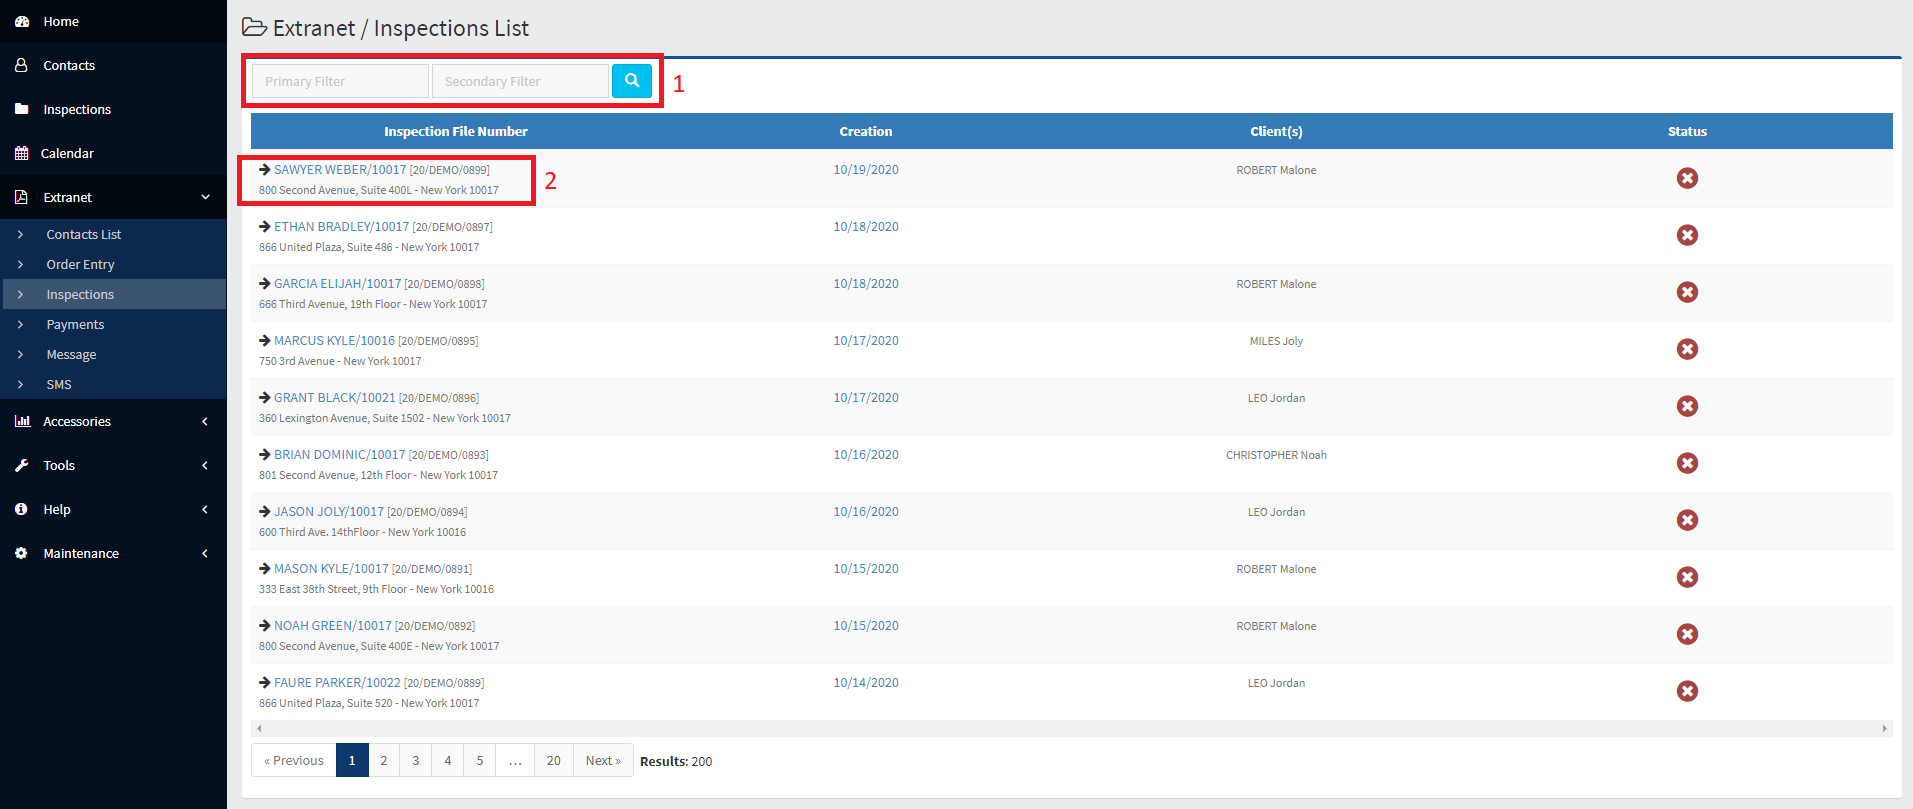
VI. 3. Records
1- Search filter.
2- File number - Click on it to open the file in the extranet ( Wiki link ).
The status of the file shows whether a download has been performed.
VI. 4. Messages
1- Search filters.
2- Allows you to delete, see the type (if it is a outgoing or incoming email), manage the status.
3- Respond to an email, view the job order associated with the email, or preview the email.

VII. Accessories
Depending on the rights granted you will have different actions available in this section.
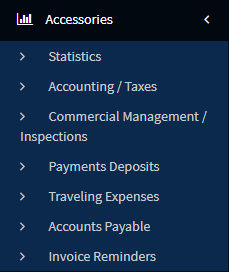 Menu with all rights (Backoffice / Administrator account)
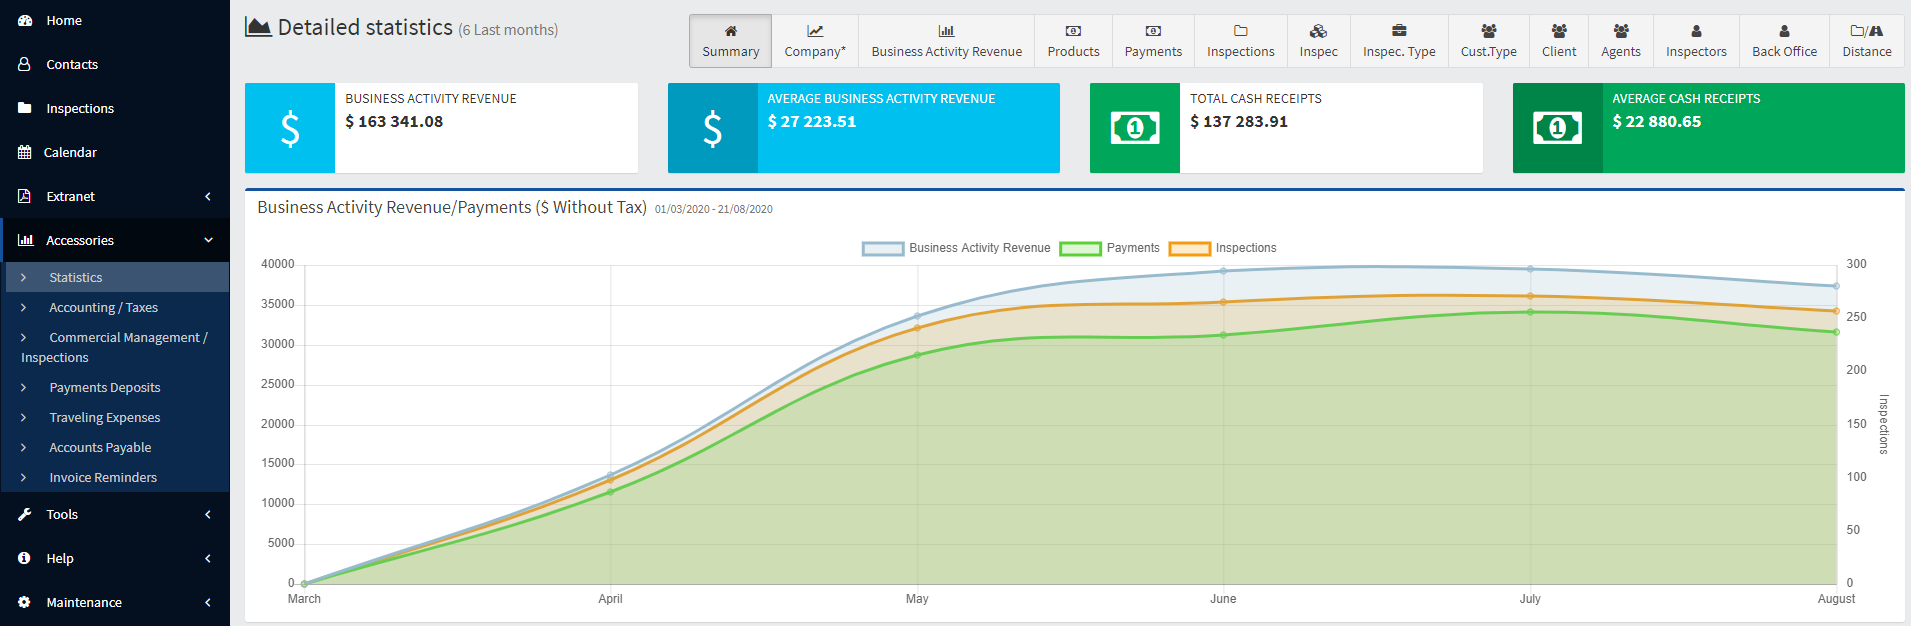
VII. 1. Statistics
To export different data to Excel.
VII. 2. Management / Accounting
For example: click on Payments, choose the dates, then click on "Export".
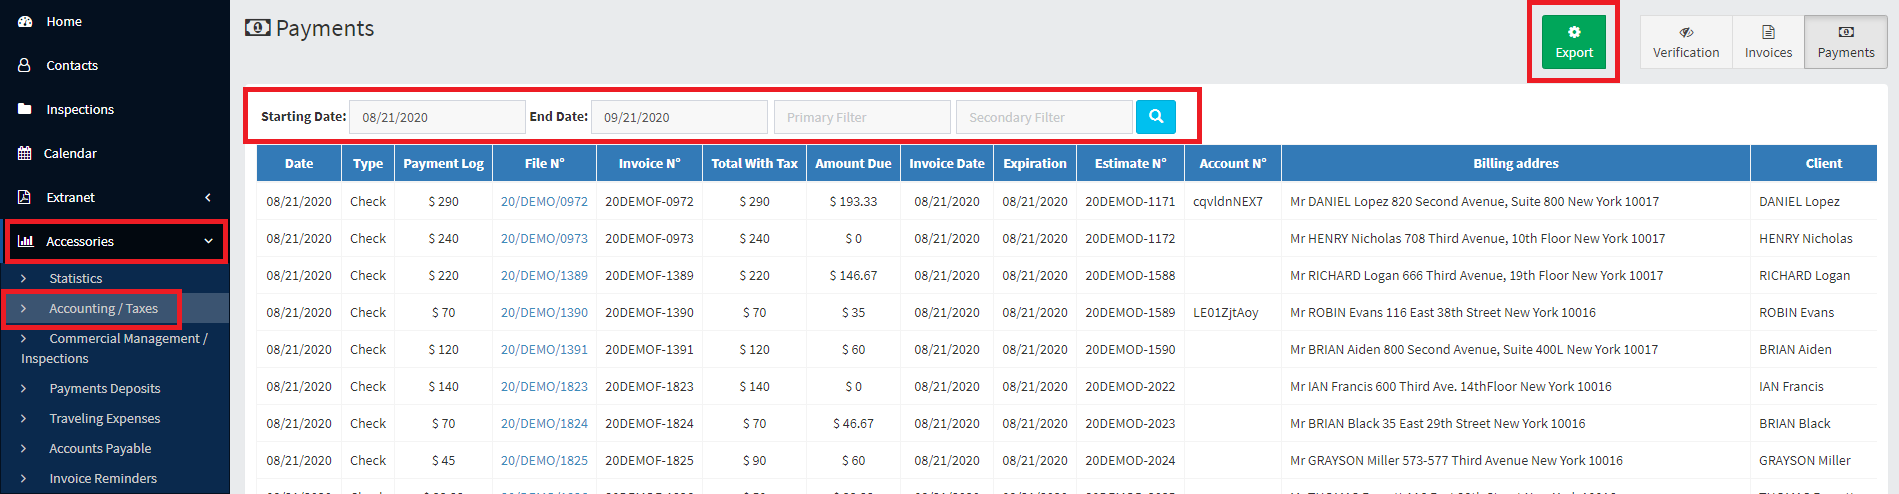
Checking invoicing errors and managing duplicates by going to Accessories / Accounting and then click Verification
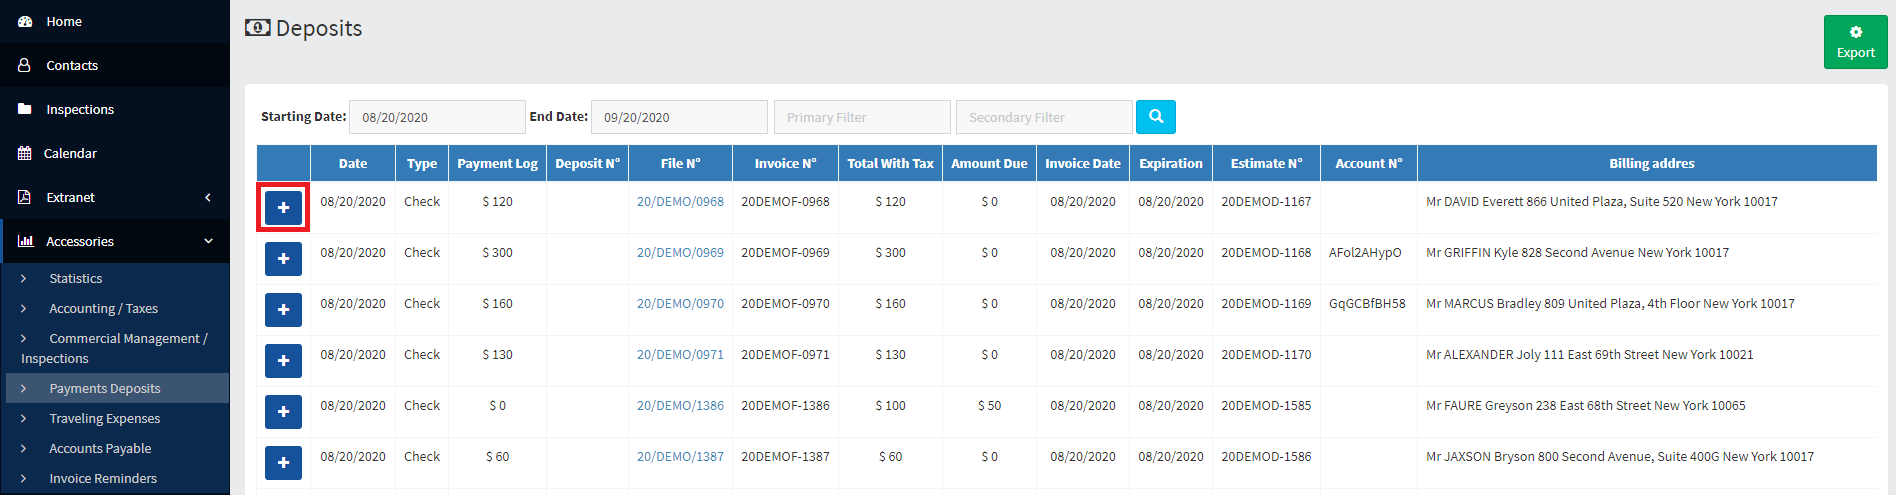
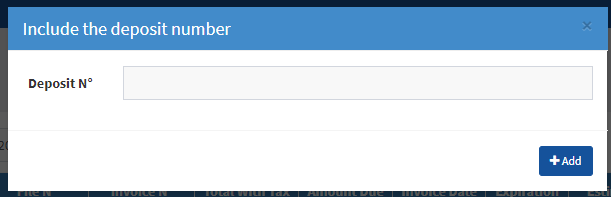
VII. 3. Check Deposits
VII. 4. Travel Expenses
Below is a visual of the travel expenses in Administrator mode. All you have to do is select a month and an operator to display its information.
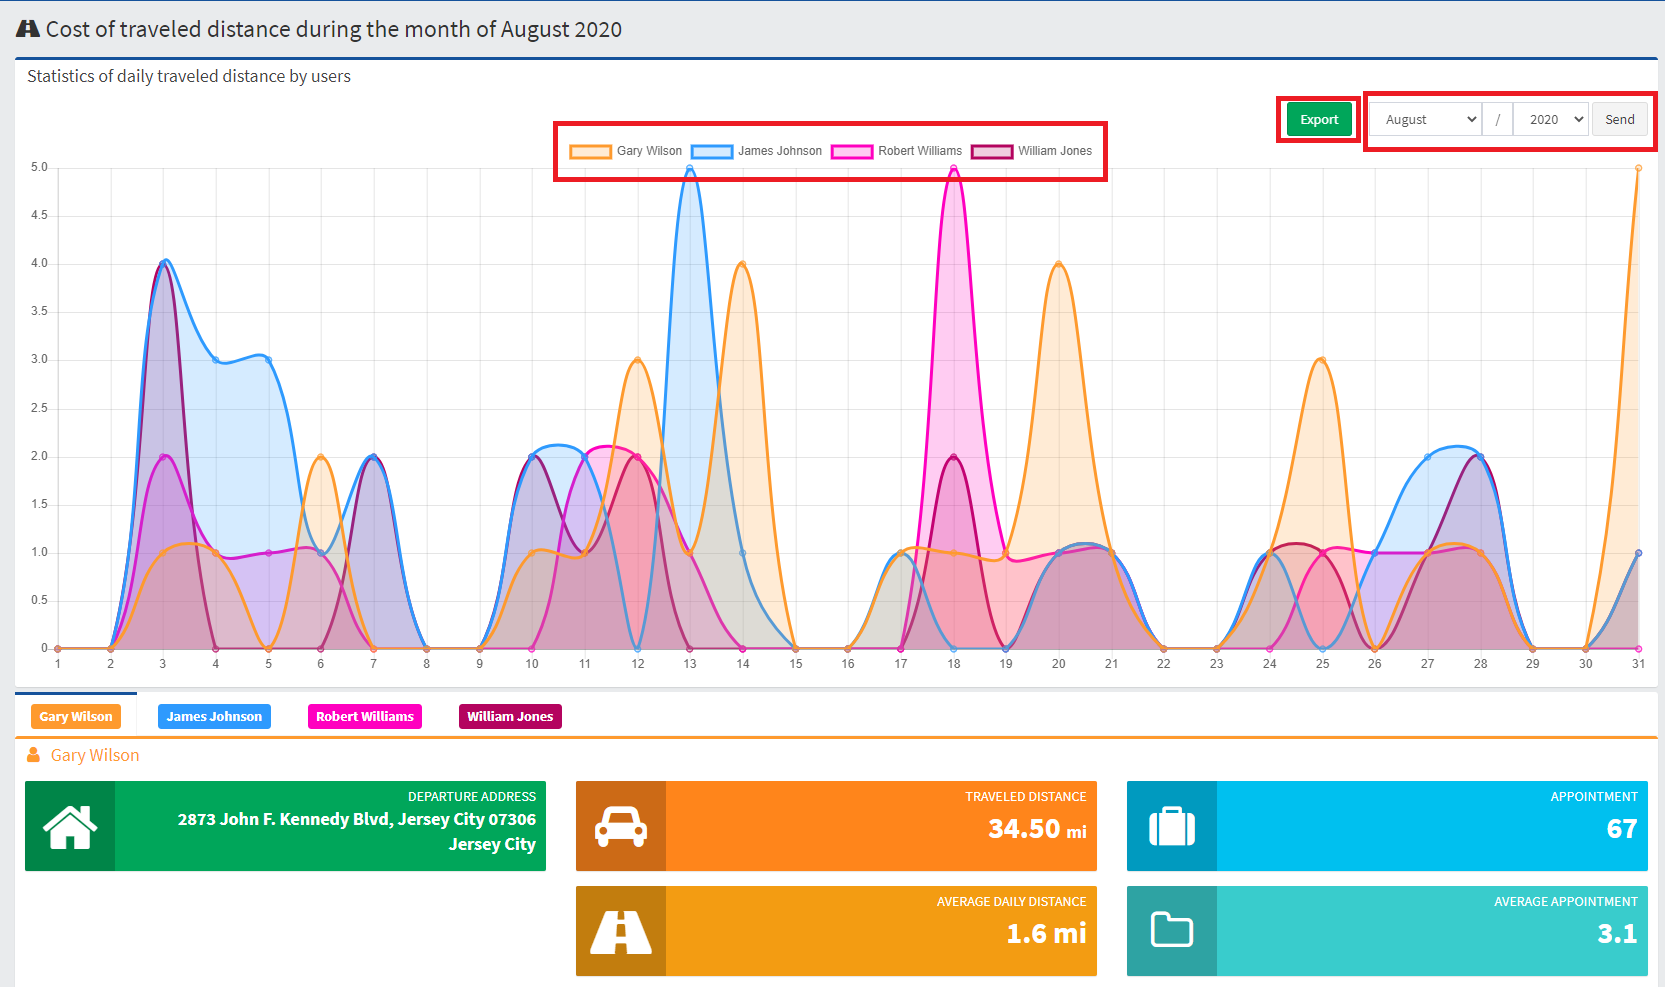
In User Mode, the diagnostician will only see its information.
VII. 5.Accounts Payable
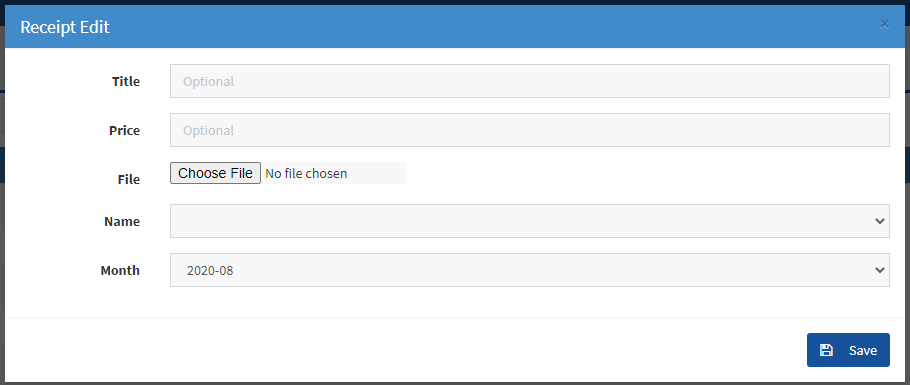
Here the list of your purchases will be displayed. You will be able to consult them and/or download proof of purchase and expense reports (submitted from the Mobile Application )

 Add a receipt by clicking Add. Enter a title, the price, and import a proof of purchase.
VII. 6. Invoice Reminders
- Select the table to view
- Filter your results
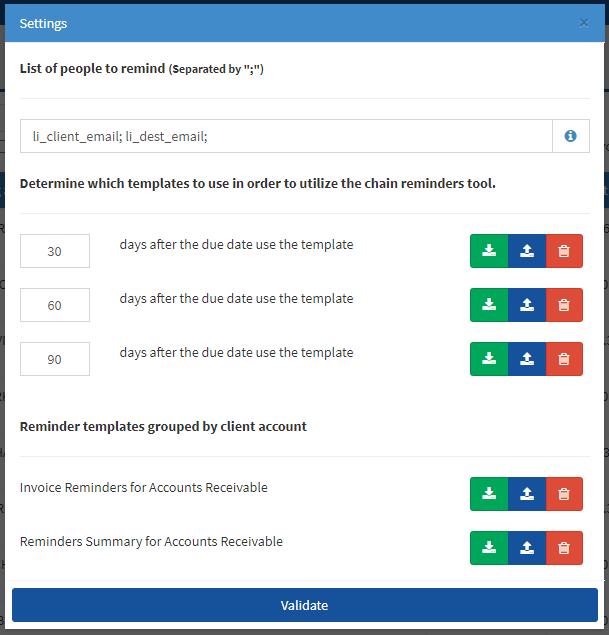
- Download the released reminders; Release the selected reminders; make a follow-up by email; modify the settings (see Image below)
- Reminder status filters
- Selection check marks
- Choice of processing or not (by clicking on the icon in that column)
- Manual sending of the reminder
By clicking on settings, modify the deadlines and type of templates to use.
VIII. Tools
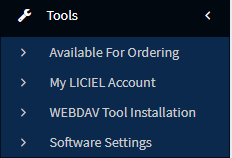
- Sends you to the Liciel website to order Liciel products online ( here ).
- Open the "My account" page of Liciel
- Install a tool to open the Liciel V4 printing tool ( Article )
- Open the Software settings
VIII. 1. The Liciel BackOffice Settings
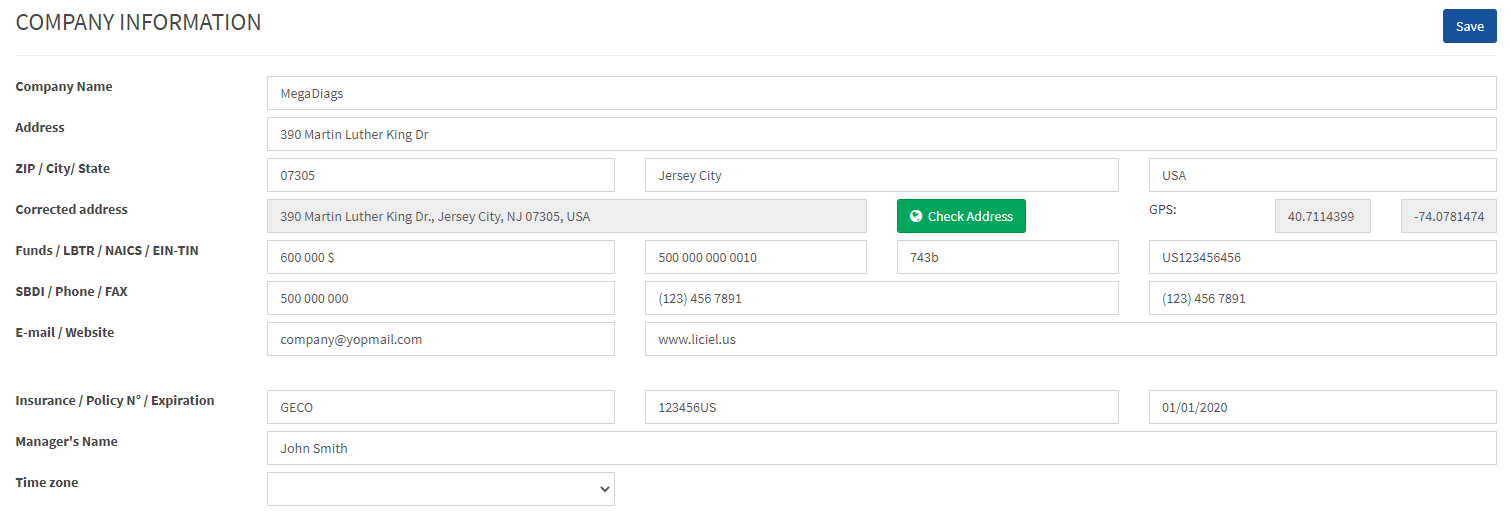
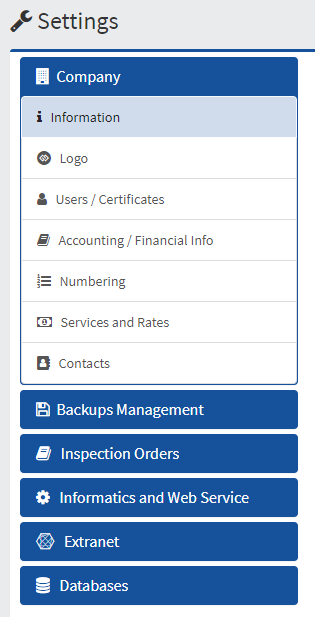 As in the Liciel Software, you have to fill in the company information. To do so, click on Information, enter the corresponding information and click Save when you're done.
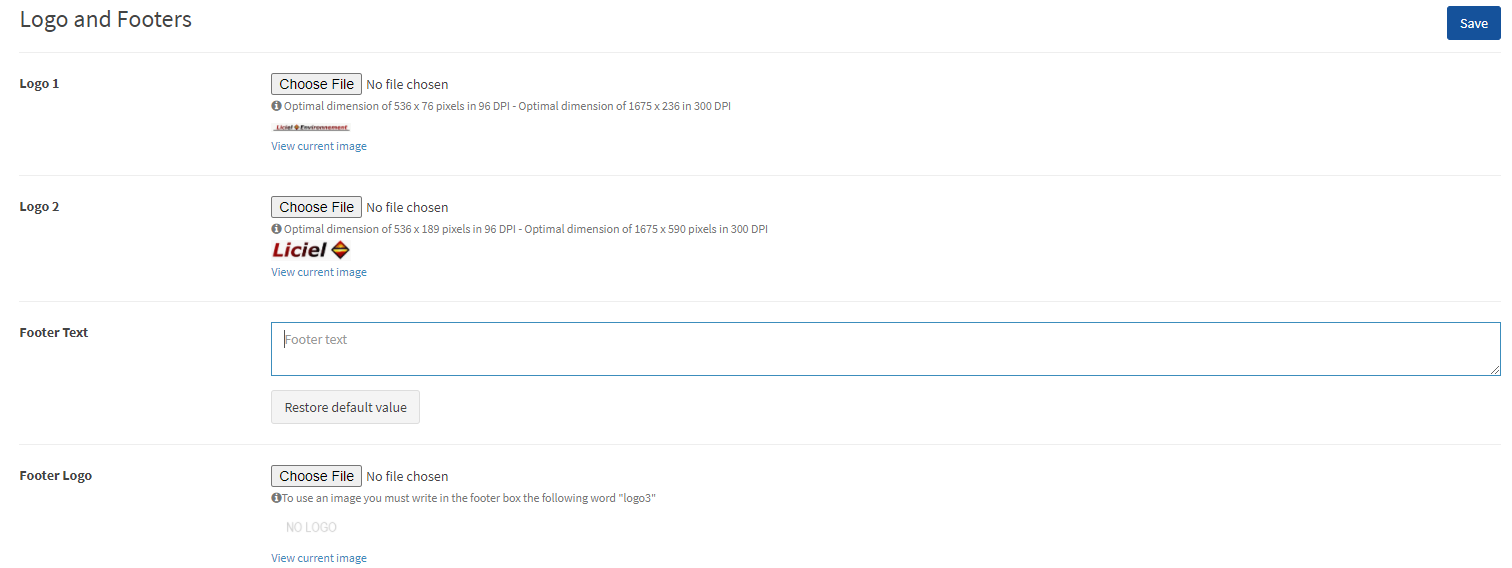
VIII. 2. Logo and footers
Same as v4 software parameters
VIII. 3. Users
As indicated previously ("II. 1. shortcuts and profile"), there are several types of users to whom we configure access.
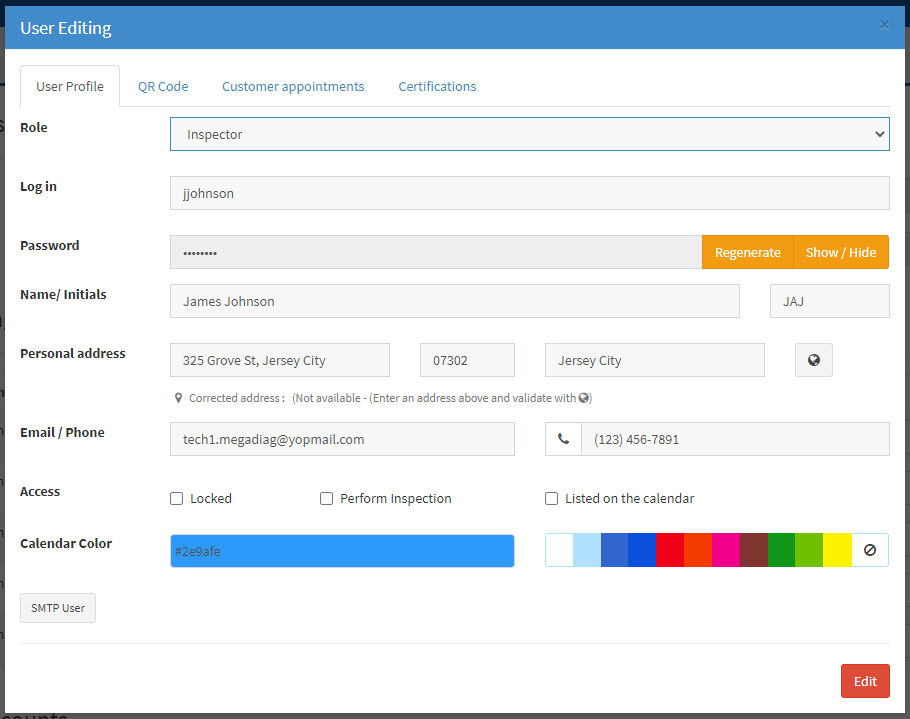
Role : Define the User Role.
- The inspector accounts give access to the files of the diagnostician concerned on the software (see chapter 1 to enter the identifiers on the V4). The annotation in parentheses defines the rights on BackOffice.
- BackOffice accounts provide access to all files, as well as to company statistics.
- Administrator accounts provide access to all files, statistics and settings.
Login : Define a login for the user.
Password : A secure password will be generated automatically for the user. You can Regenerate / View it.
Name / Initials : Must be identical to those entered in the Operator profile on the V4 for a smooth exchange of files.
Private address : Define the start / return address of the diagnostician for the calculation of mileage charges.
Email / Phone : Enter the user's contact information (especially for tour reminders).
Access : Define account access.
- Blocked: No more access to the web interface or to the folders on V4.
- Performs diagnostics: Becomes available in the drop-down menu of the provider's choice in the ODM.
- Listed on the calendar. You can also define a color on the Geolocated Calendar.
SMTP user : Allows this user to send emails from their own mailbox rather than the company mailbox.
QR Code : Find the image of the user's QR code to share with them for connection on the mobile application.
Client appointments : Define the missions that the user can perform, as well as his availability (times, days) for making an appointment online.
(by default, if the menu is empty, the user will be considered as being able to carry out all the missions offered by the company, every day the latter is open).
Attestation / Certifications : Fill in the Certification / Signature information for the user (identical to the Operators / Certificates menu of V4)
Once your employees' accounts are configured, you can share their credentials with them.
In order to benefit from all the functions linked to the BackOffice account in LICIEL Diagnostics Software, each user must indicate their identifiers (in the Tools menu - Software parameters).
VIII. 4. Accounting / RIB-IBAN - Numbering - Prices - Contacts
These are the same parameters found in Liciel V4.
VIII. 5. Backup
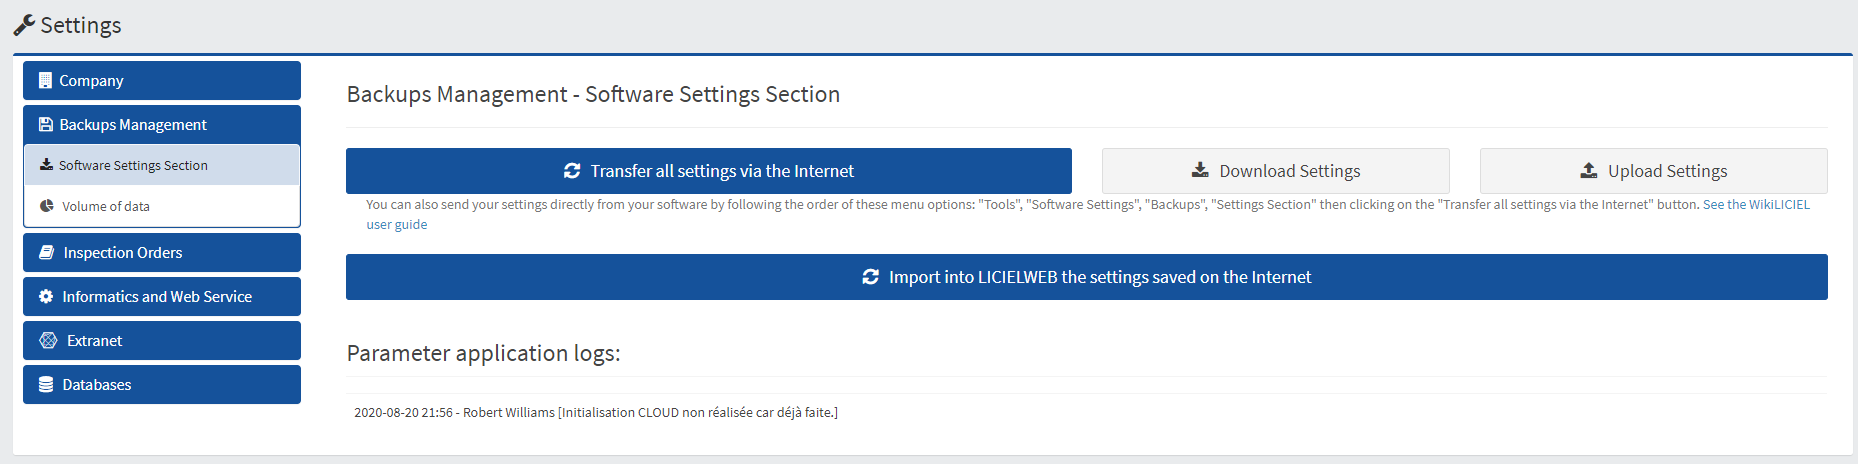
Import / Export Configuration Parameters. (see Parameter transfer manual )
VIII. 6. Appearance
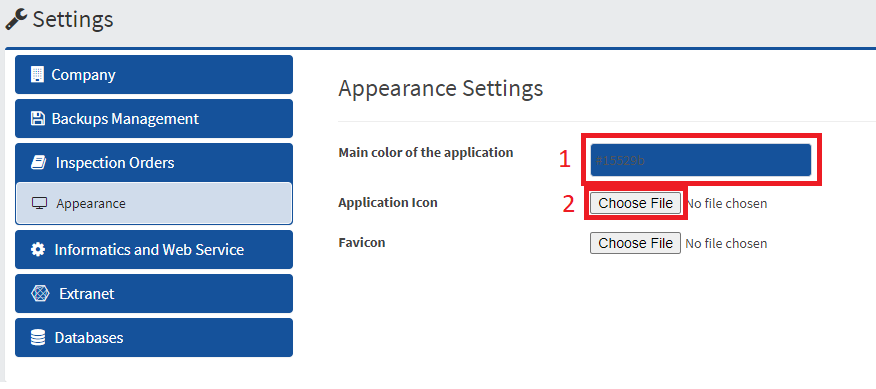
- Choose the application color
- Select the application icon (top left of the web page)
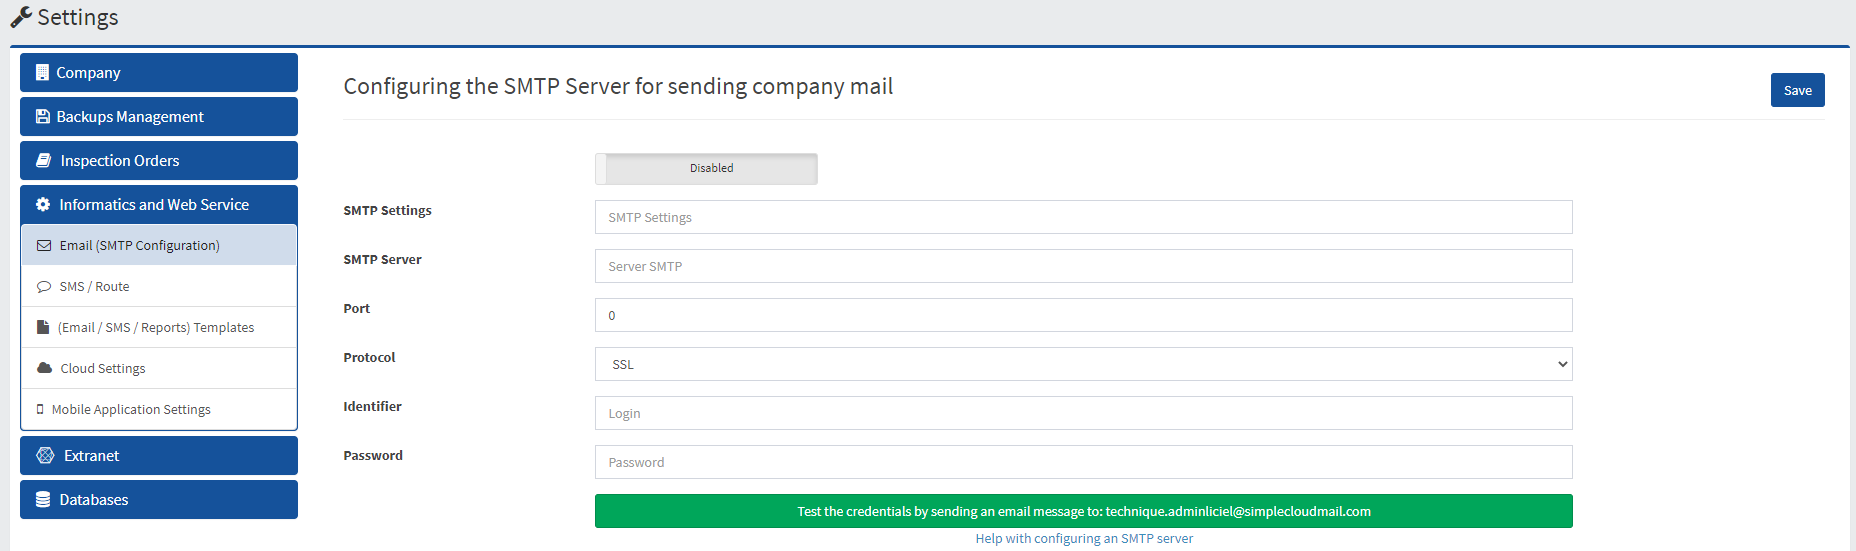
VIII. 7. Email (SMTP Configuration)
Mail and SMS sending settings (SMTP). Consult the SMTP configuration parameters article
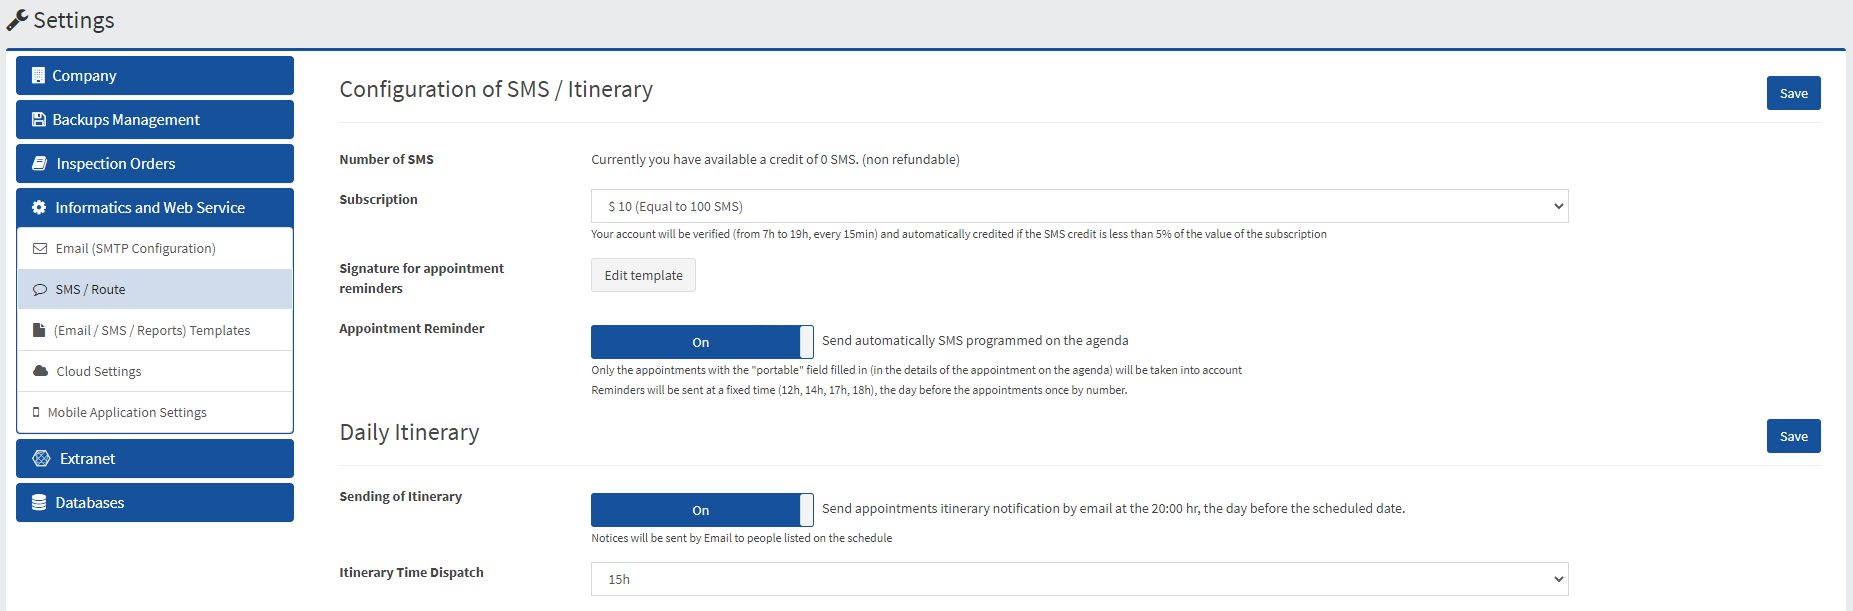
VIII. 8. SMS / Tours
Manage your appointment reminder settings by SMS.
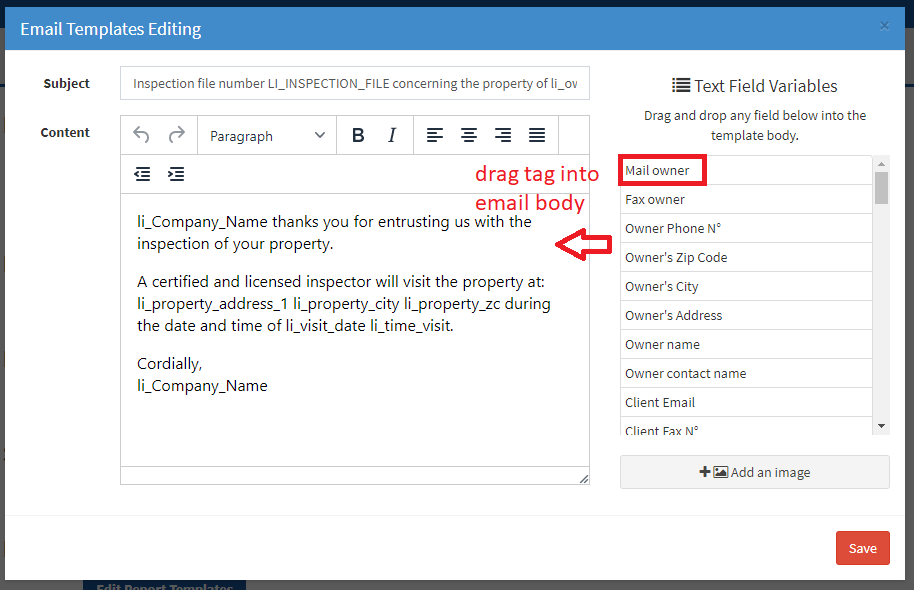
VIII. 9. Templates (Mails / SMS / Report)
Allows you to edit the templates of your different mails / SMS.
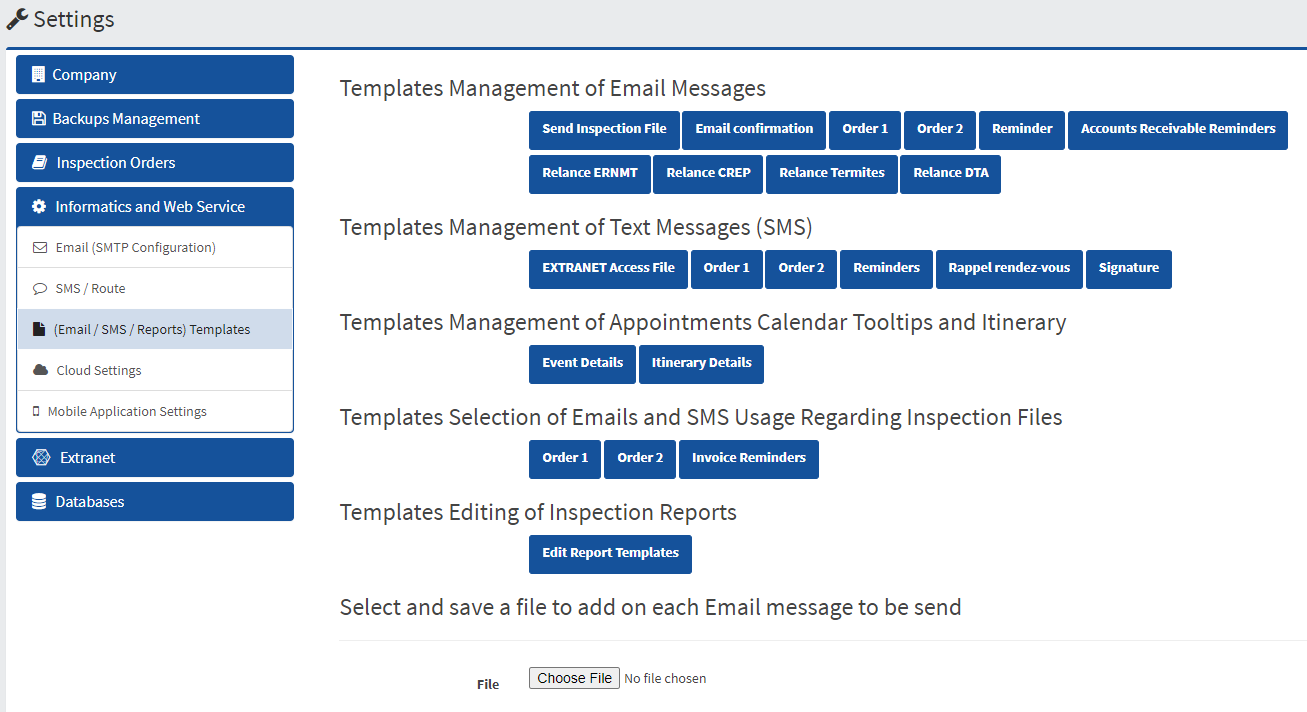
To edit a template, open it and enter the text of your choice in raw. To retrieve information from the file, do a Drag & Drop so that the text tag is put in place in the body of the message.
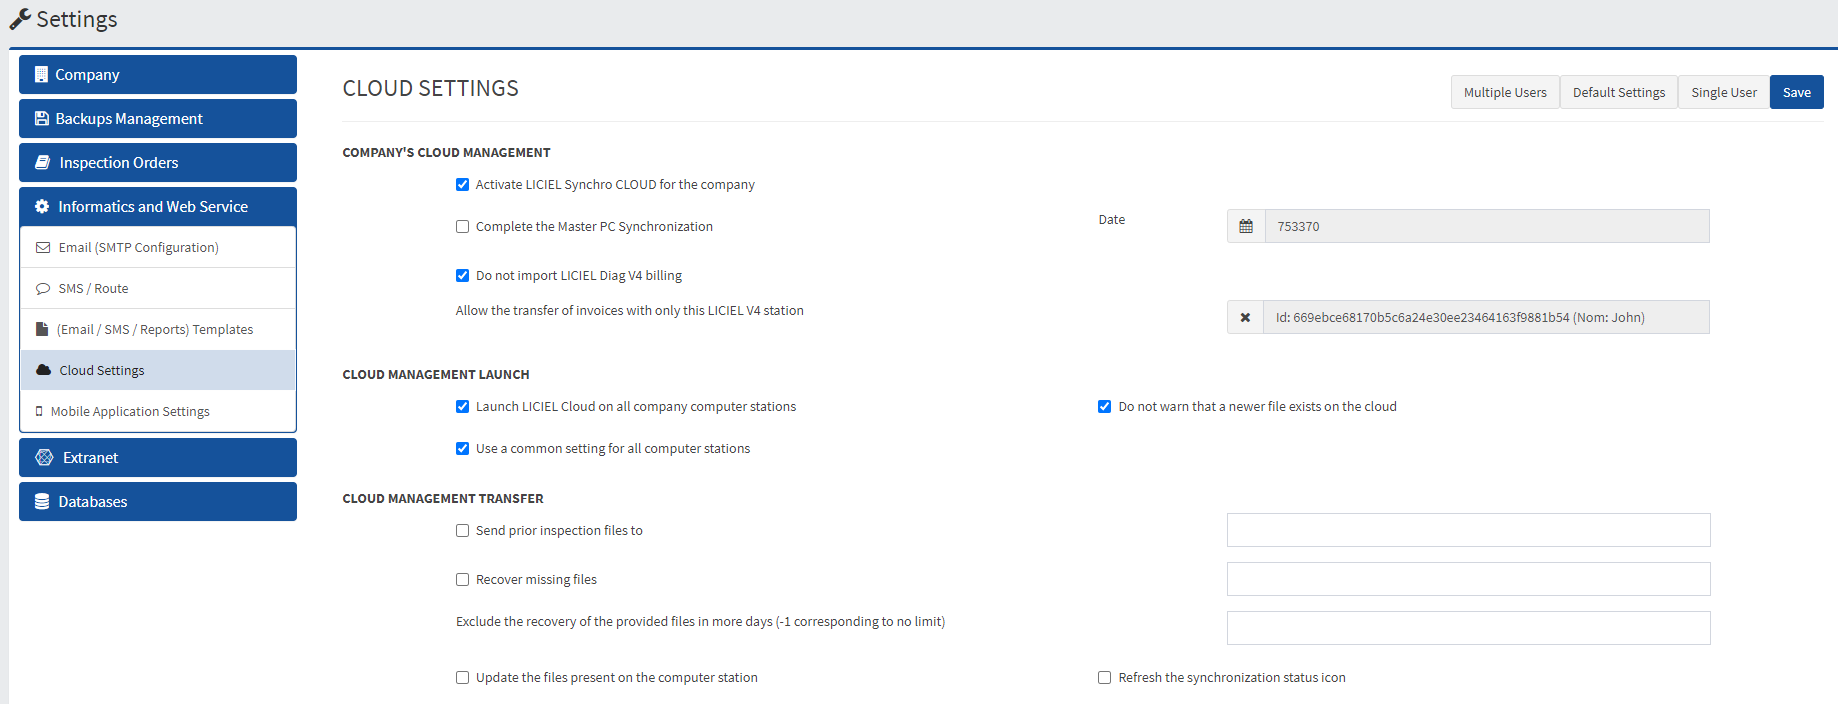
VIII. 10. Cloud settings
Common cloud settings for your company. See the Cloud Settings Article.
VIII. 11. Mobile Application Settings
Allows you to view / block activations on the mobile application.
More information on the dedicated article: Mobile Application
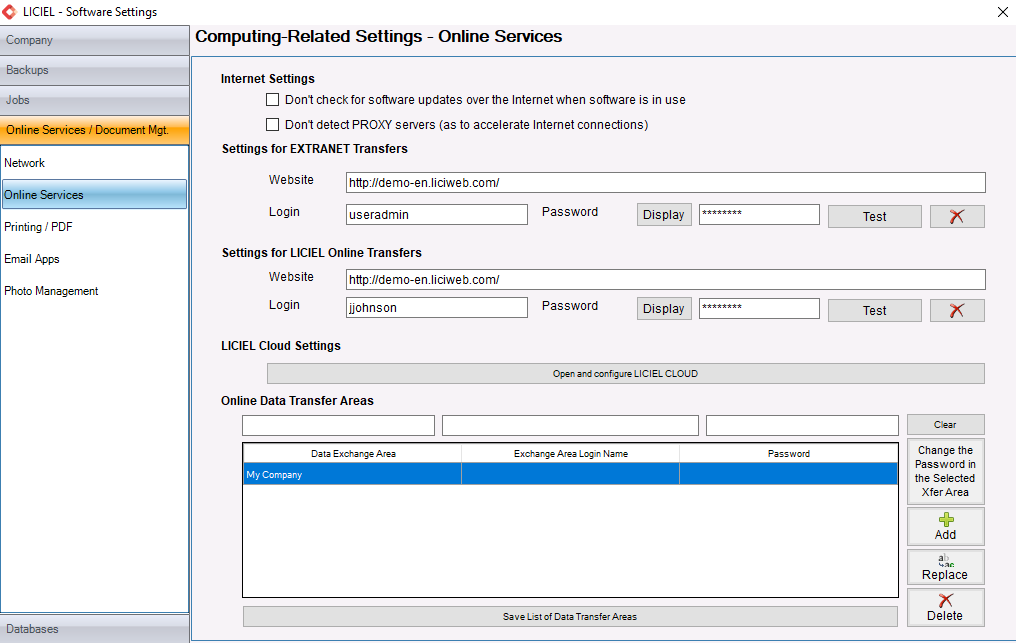
VIII. 8. Extranet settings
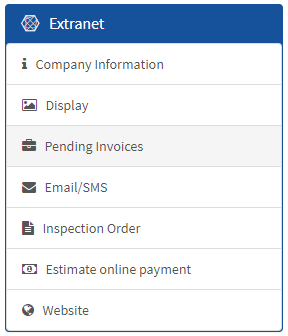
Allows you to manage the configuration of your Online Office Extranet: Article .
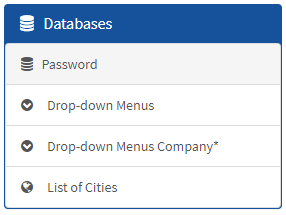
VIII. 13. Database
Identical to the Liciel Software, modify the drop-down menus and list of Cities
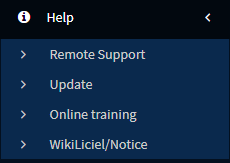
IX. Help
For remote control, click on Remote assistance.
Update sends you updates to the Wikilciel web page
Online training sends you to our website to the training videos page
Wikiliciel / Article refers to Wikiliciel