|
|
CLOUD SOFTWARE |
LICIEL Cloud is an optional system integrated directly into your LICIEL Diagnostics software allowing you to automatically save your missions and reports. You also have the possibility of synchronizing all of your files on all your computers and tablet PCs equipped with LICIEL Diagnostics software.
The setting up of LICIEL Cloud is automatic, that is to say that you do not have to install anything.
We will explain to you how to set up your Cloud within your company.
Note: It is imperative to follow the initial setup from your company's administrative workstation, because it will define the initial state of your Cloud. This post including your up-to-date accounts will be called the "Master Post".
In order to set up LICIEL Cloud in a simple way, you will need
1) Order the LICIEL Cloud option by going to the menu " Tools / Order products online / LICIEL Cloud "
2) After placing your order, you may see a pop-up appear in your LICIEL Diagnostics software at the bottom right of your screen.
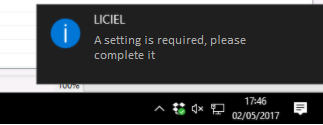
This tells you that your purchase has been taken into account. We invite you to click on it to launch the Cloud activation.
3) Wait for the data from the main station to be synchronized (depending on your internet connection and the number of files, count between 2 hours and a weekend)
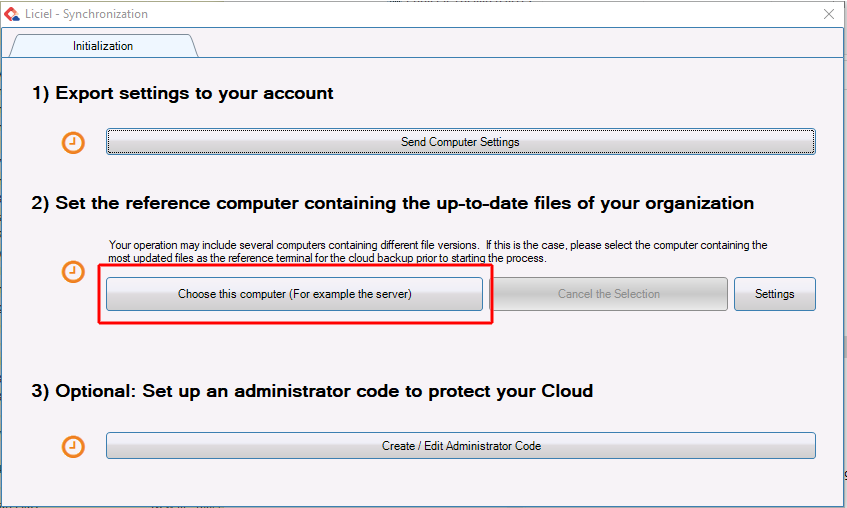
When synchronization is complete, the initialization screen will disappear
4) Configure the desired type of synchronization / Activate synchronization on other workstations in your company
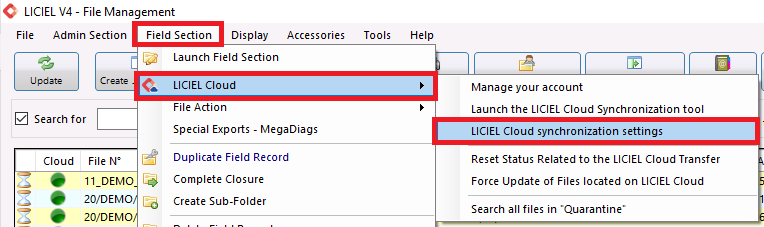
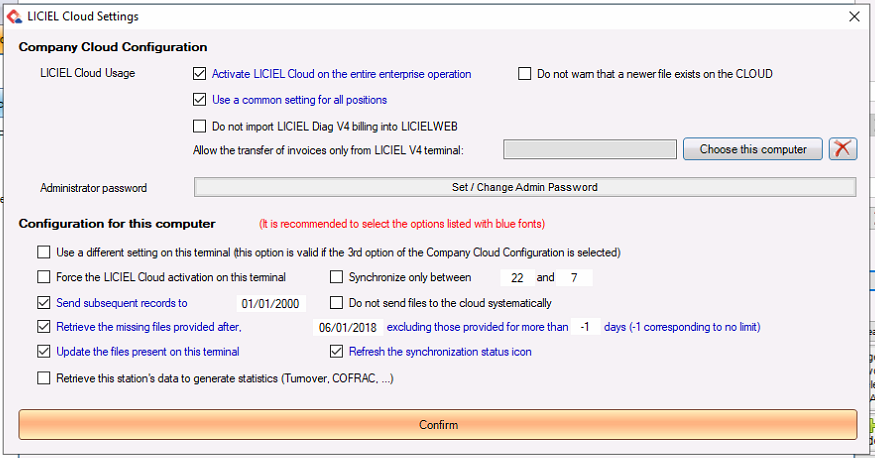
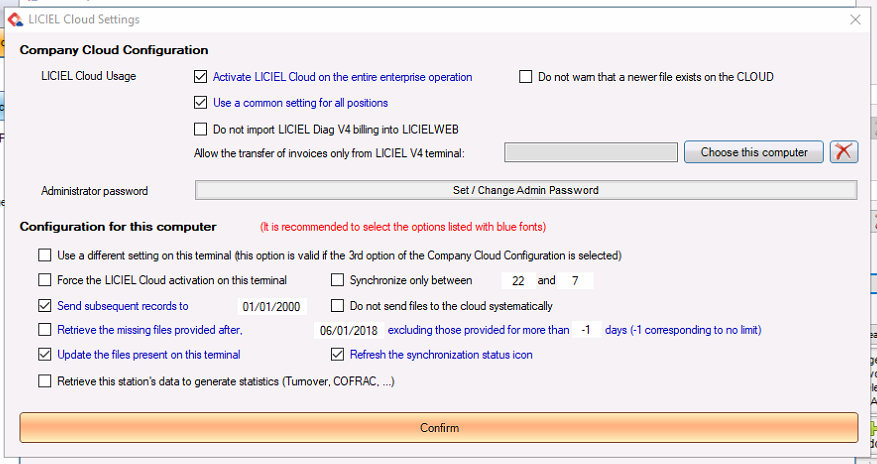
Returning to the Synchronization tool, check the following boxes according to the desired Cloud use mode:
Warning ! When you enter the settings, an authentication message asking for a Password will be displayed. If you have never entered a Password, click on Validate.
Automated sending of files to the Cloud:
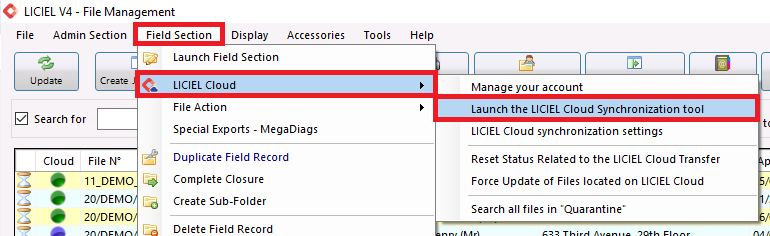
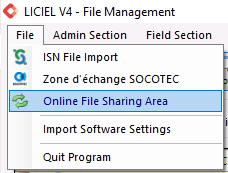
To access this configuration window, go to your LICIEL software, click on the following menu:
A) You want to work in synchronized mode (all computers update and send their files)
B) You want protection of your data only, on all the computers of your company
C) You want data protection for the administrative / server computer only.
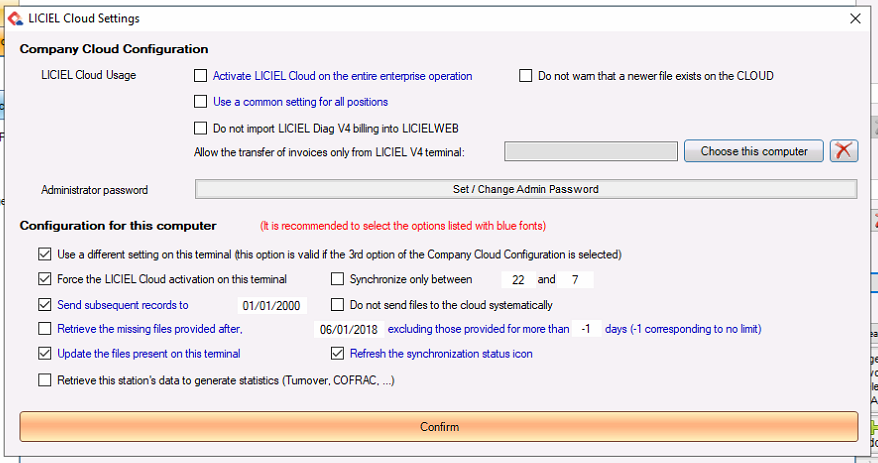
Once the common configuration of your Cloud has been set up, we recommend that you set up a password for the Cloud configuration, and configure your Administrative station as follows:

As a result, the Administrative station will continue to synchronize all the files, without influencing the configuration of the other stations, and will keep a copy of the statistics present on our servers.
In addition, setting up a blocking of the billing menu will prevent any bill generation error on a tablet and allow you to keep your billing centralized on your master station.
Manual sending of a file to the Cloud:
You also have the option of manually sending a file to the Cloud in order to share it with your collaborators or simply to make a backup.
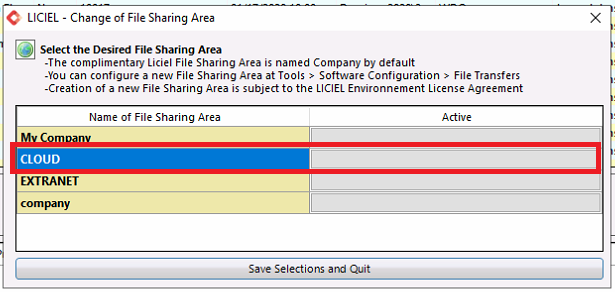
First, select the exchange zone for your shipment, in our case it will be the Cloud zone :
- Go to the menu " File / Diagnostic exchange zone on the web "
- Then once the exchange zone is displayed in the Diagnostics software, click on the " ![]() " icon to select the " CLOUD " exchange zone .
" icon to select the " CLOUD " exchange zone .
(Three zones are available: Cloud, to display the files in the cloud, Liciweb, to display the Extranet orders and be able to upload them, Company to display the Exchange Cloud zone)
Note: The company zone can be used to exchange files between colleagues. This is the cloud with a filter showing only the folders put in the cloud exchange zone.
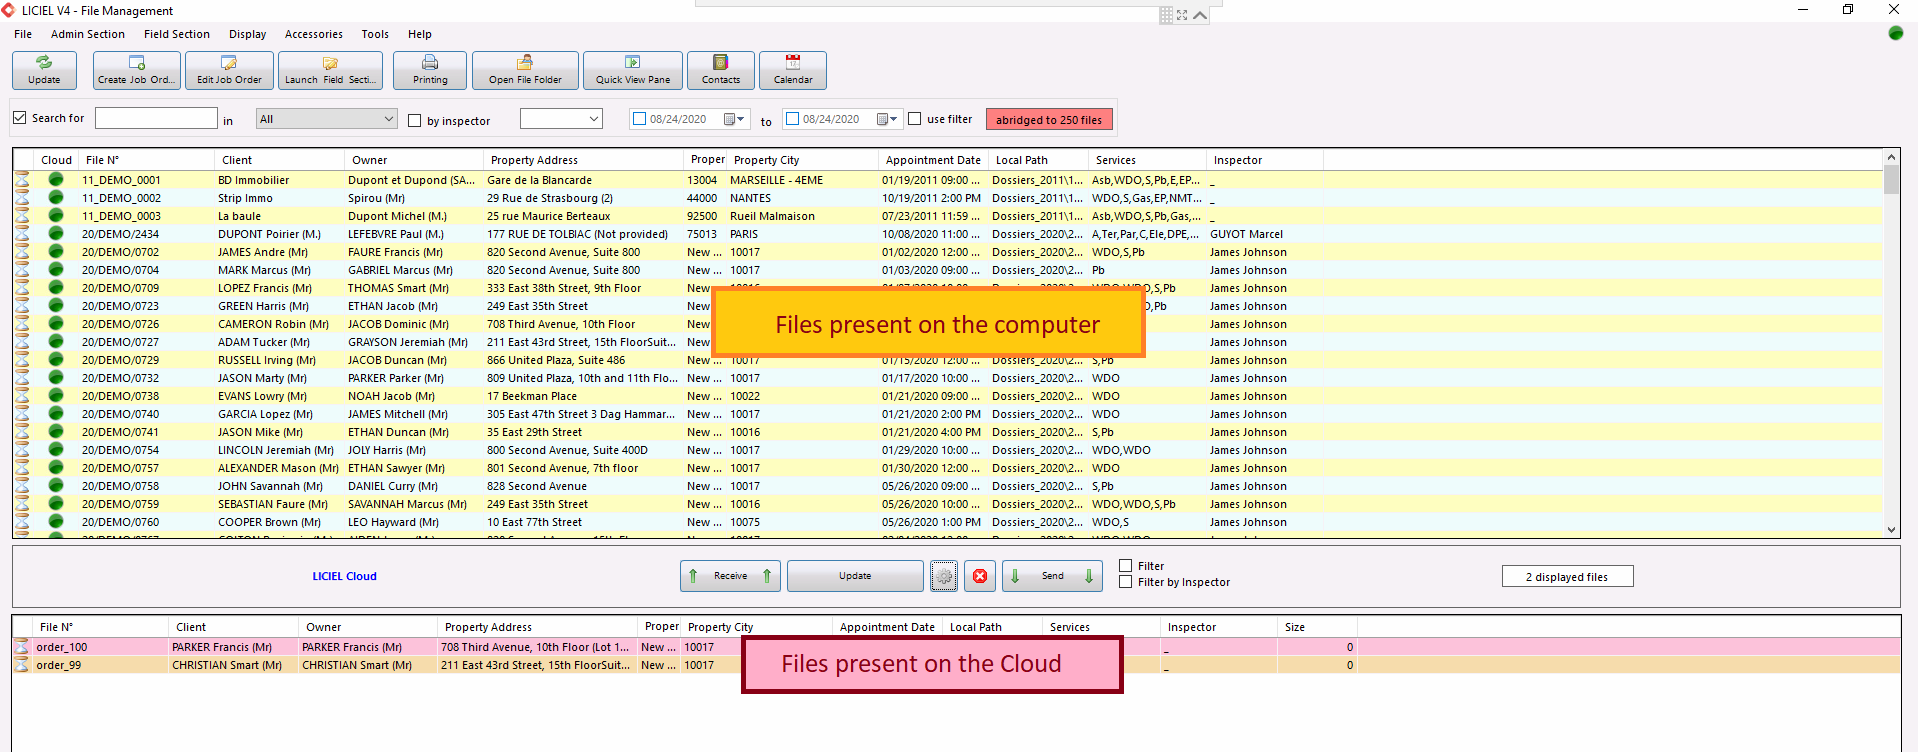
Once the Cloud zone has been selected, all the files present on the Cloud will appear in the lower part of Liciel Diagnostics.
The display is restricted to 250 files so as not to saturate the software. To search for a folder, please check "Filter", then use the "Search" box.
Synchronization state:
In order to let you know what is the status of your files, you can leave the cursor on the colored icon, you will be indicated what its status is.
-
Green: Transferred
-
Orange: To be checked
-
Purple: To be treated
-
Red: Delete / transfer error
File transfer:
From your workstation to the Cloud: select a file found on your workstation and click on the "Send"
button . From the Cloud to your workstation: select a folder in the Cloud and click on the "Reception" button .
You can apply the usual filters in network or LICIEL Cloud mode (but be careful not in Web exchange zone mode).
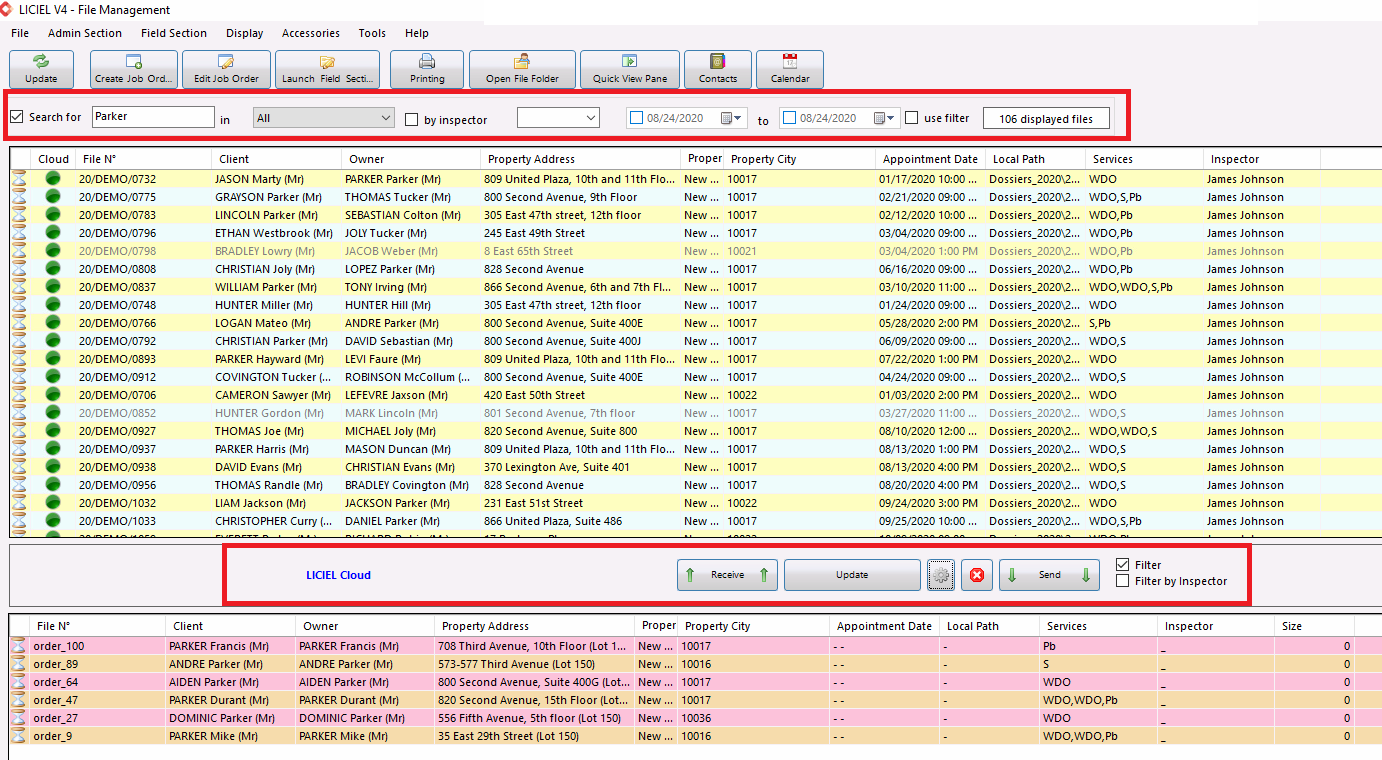
Cloud Research:
To carry out a search on the Cloud, you must launch a search on the "Search" field of Liciel Diagnostics, this search will also be effective on the window of the exchange area.
Also check that the "Filter" box is checked in the central part of the screen.
As mentioned in the Folder Numbering documentation , it is not recommended to use names in your numbering.
Indeed, renaming your files will have the effect of creating a duplicate (the CLOUD will not recognize the file), which will generate in particular duplicate invoices.
If you need to rename a folder, you will need to delete it on the CLOUD:
Deleting data on the CLOUD:
To delete one or more folders on the Cloud, first make sure you have them secured on another system.
Using the software search presented above, find the folder (s) to delete.
Select the (s) in the lower part of the screen and click on the delete button (red cross).
The folders will be deleted only on the Cloud but not on the different PCs where they might be located.
However, they will no longer be exported automatically because they are classified in a red ball (For deletion) on the various stations. You can backtrack by sending them back to the Cloud manually.
In the case of a deletion of a past period, it will also be necessary to configure the Cloud on the different machines and change the two transfer dates.