 Wind Mitigation Inspection
I. Introduction
The Wind Mitigation Inspection module allows you to document both wind mitigation features and add-ons that reduce the amount of damage a property may suffer in the event of a major storm or hurricane.
This module, which works in conjunction with the Home Inspection Module, is organized into eight horizontal tabs:
- Code - Cover
- Attachments
- Geometry - SWR
- Openings
- Openings - Cont.
- License
- Pictures
- Attachments
 ), located in the upper right of the window and available on
each of the aforementioned tabs (see a detailed explanation,
below).
), located in the upper right of the window and available on
each of the aforementioned tabs (see a detailed explanation,
below). 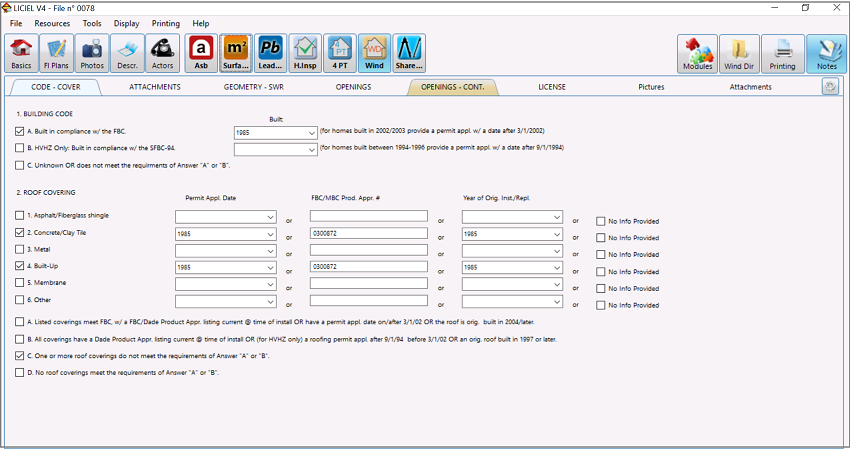
II. Code - Cover Tab
The Code - Cover tab (see above) allows you to enter basic information about the building code and roof covering.
II.A Building Code SectionThe Building Code section allows you to indicate if the property was built in accordance with the Florida Building Code (FBC) or not.
Use the Building Code checkboxes to select the option that applies to the property in question.
Use the Built drop-down menus to indicate the year of construction.

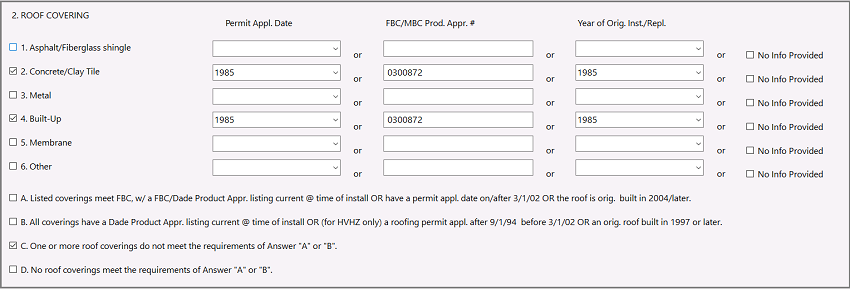
II.B Roof Covering Section
The Roof Covering section allows you to select all roof covering types in use, enter the permit application date or FBC/MBC product approval number, introduce the year of original installation/replacement, or indicate that no information was available to verify compliance for each roof covering identified.
Use the Roof Covering checkboxes to select the covering type(s) that applies to the property in question.
Use the following drop-down menus to enter data regarding the permit application date, product approval number, and/or year of installation/replacement.
Use the checkboxes on the far right if there is not available info about these parameters.
Use the checkboxes at the bottom of the window to indicate if the coverings meet the state/county requirements or not.
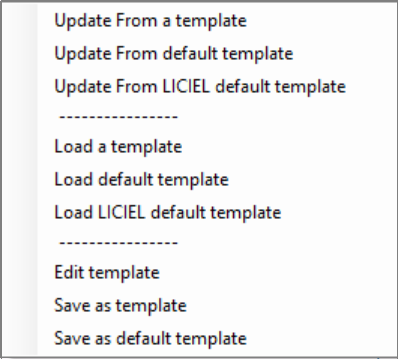
II.C Options Menu
The Options menu allows you to manage the Wind Mitigation Inspection templates.
In the upper right of the window, click on
to open the menu. Update from a template - updates ... Update from LICIEL default template - updates the file based on the Wind Mitigation Inspection databases saved in the Database Management section of your Software Settings tool. Load template - uploads a template saved in your computer. Load default template - uploads a default template saved in your computer. Load LICIEL default template - uploads a LICIEL template saved in your computer. Edit template - allows you to modify the content of the Wind Mitigation Inspection tabs. Save as template - allows you to save your edits as a template. Save as default template - allows you to save your edits as a default template. |
III. Attachments Tab
The Attachments tab allows you to select the roof deck/roof to wall attachment types present in the inspected property.
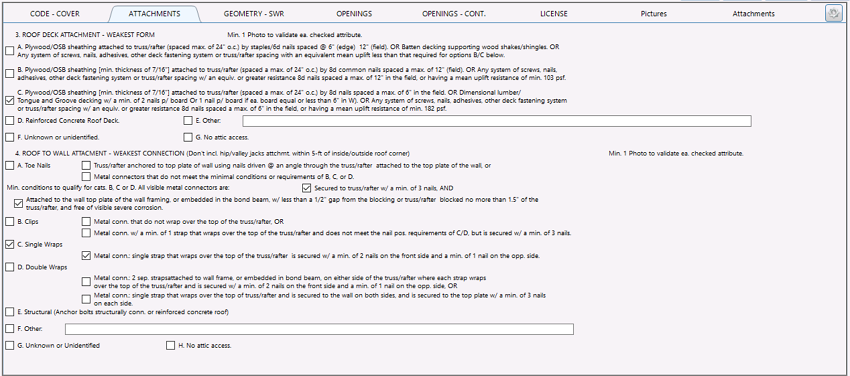
III.A Roof Deck Attachment - Weakest Form Section
The Roof Deck Attachment - Weakest Form section allows you to indicate the roof deck attachment type(s) present in the property in question.
Use the available checkboxes to select it/them.
If the roof deck attachment is different from the ones listed, check the Other box and use the text field beside it to enter information about it.

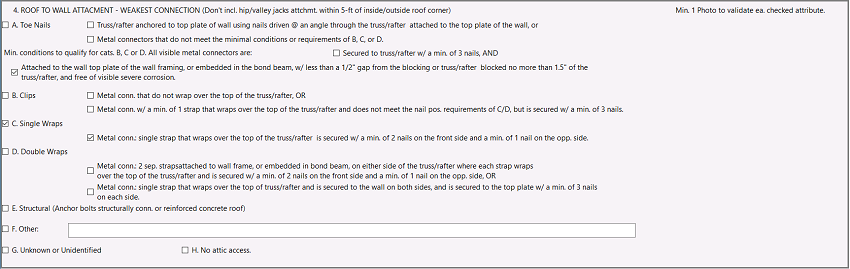
III.B Roof to Wall Attachment - Weakest Connection Section
The Roof to Wall Attachment - Weakest Connection section allows you to indicate the roof to wall attachment type(s) existing in the inspected property.
Use the available checkboxes to select it/them.
If the roof to wall attachment is different from the ones listed, check the Other box and use the text field beside it to enter information about it.
IV. Geometry - SWR Tab
The Geometry - SWR tab allows you to introduce the property's roof shape(s). It also allows you to indicate if the inspected property has a secondary water resistance barrier or not.
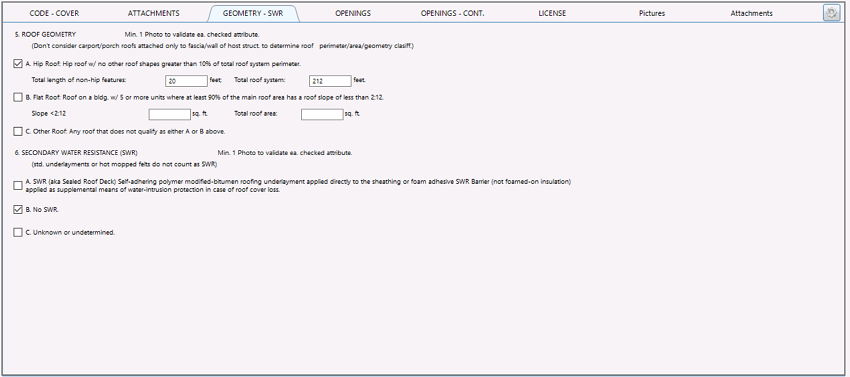
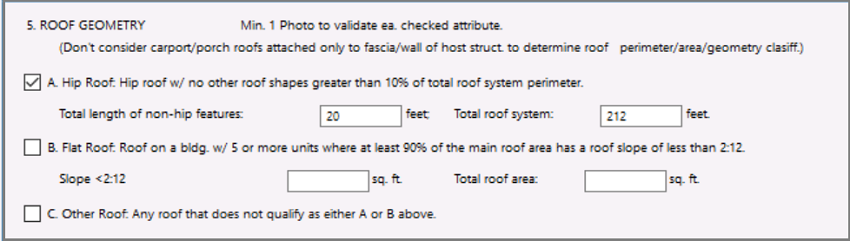
The Roof Geometry section allows you to indicate the roof shape(s) and its/their length or area.
Use the available checkboxes to introduce this information.
IV.B Secondary Water Resistance Section
The Secondary Water Resistance section allows you to indicate the presence or not of a secondary water barrier in the inspected property.
Use the available checkboxes to enter this data.

V. Openings Tab
The Openings tab allows you to indicate the opening protection installed on the inspected structure.
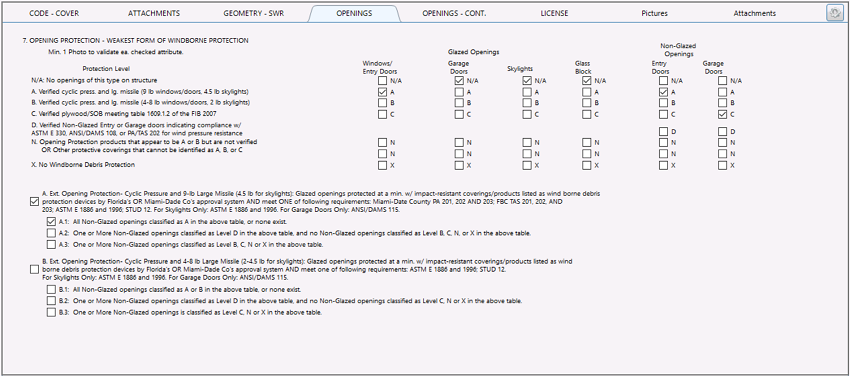
The Opening Protection - Weakest Form of Windborne Protection section allows you to indicate the weakest form of windborne debris protection existing in the property.
Use the table to determine the weakest form of protection for each category of opening.
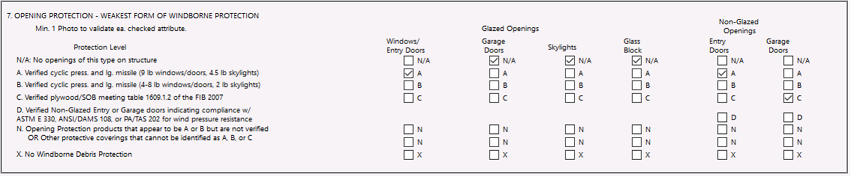
V.B Exterior Opening Protection Section
The Exterior Opening Protection section allows you to indicate if the glazed/non-glazed openings meet the state/county requirements or not.
Use the checkboxes to enter this data.

VI. Openings - Continuation Tab
The Openings - Continuation tab allows you to complete the Exterior Opening Protection section.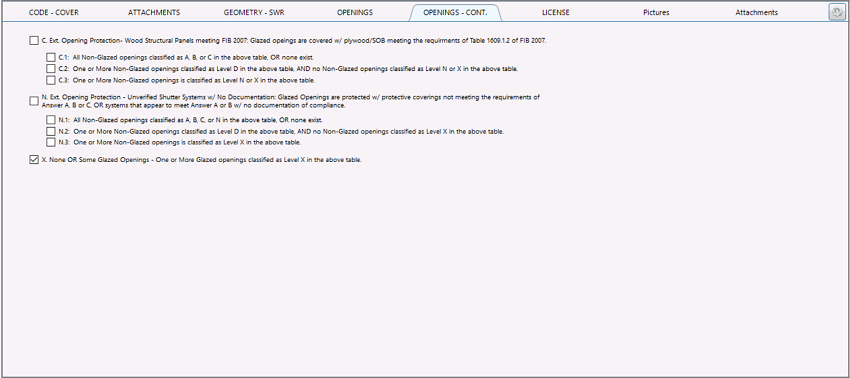
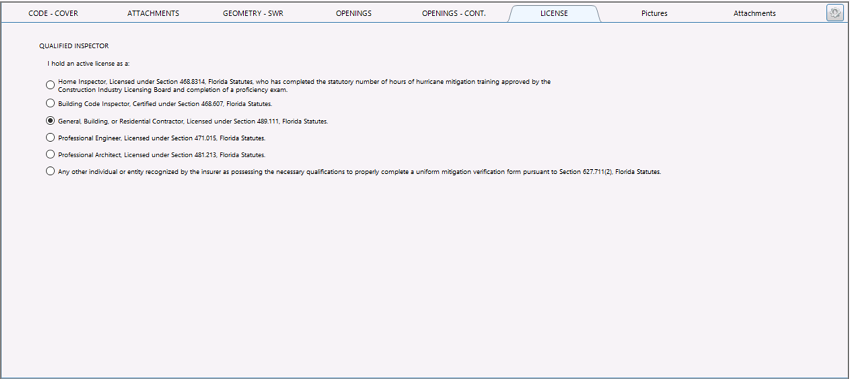
VII. License Tab
The License tab allows you to indicate the type of license that you have.
VIII. Pictures Tab
The Pictures tab allows you to you to add photos and manage them depending on your needs. Images previously added in the Home Inspection Module will display in the List of Images section when unchecking the Only Wind Mitigation checkbox.
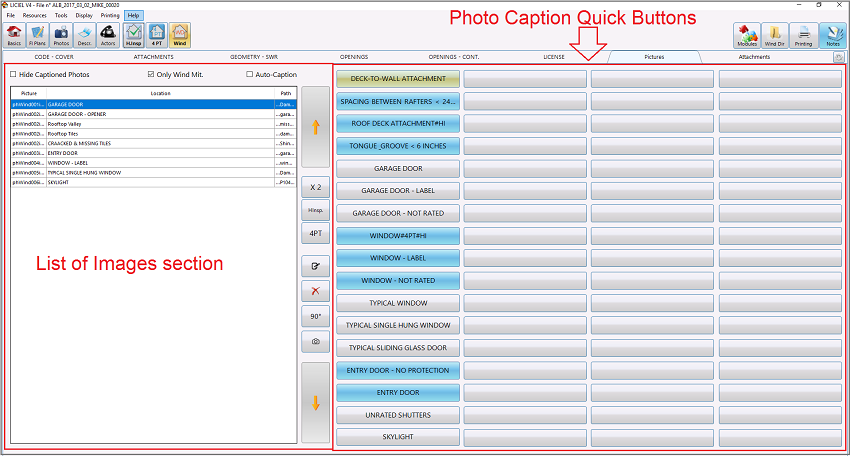
Use these options and buttons to manage the List of Images section.
 | to hide/show captioned photos. |  | to share the selected image with the 4 Point Insurance Inspection. |
 | to only display Wind Mitigation Inspection photos. When unchecked, it will show the Home Inspection images. |  | to edit the image's location name. |
 | to hide/display the photo's previews. |  | to display the following menu to unlink/delete the selected image and remove all photos:  |
 | to move the selected image up in the list.* |  | to rotate the selected image. |
 | to duplicate the selected image's location. |  | to add a photo. |
 | to share the selected image with the Home Inspection module. |  | to move the selected image down in the list.* |
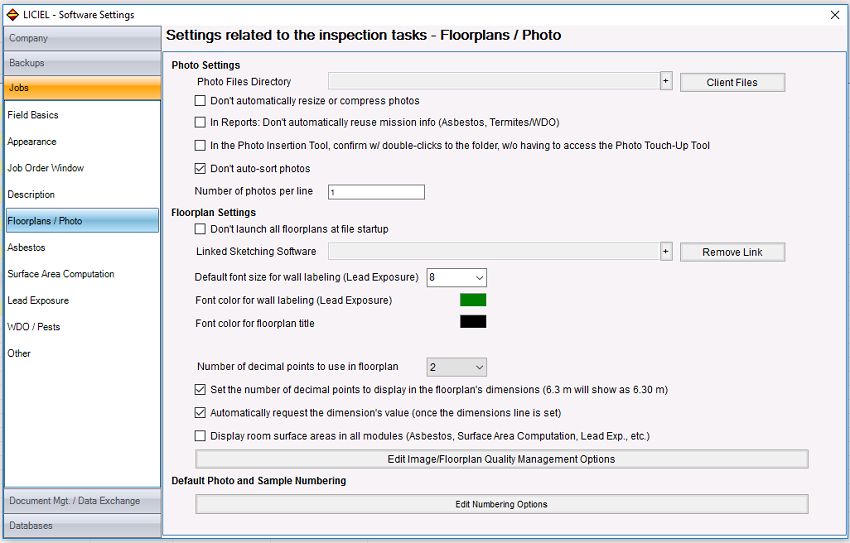
* To activate the  functions: functions: 1. On the Home screen's Menu bar, click on Tools drop-down menu> Software Settings> Jobs> Floorplans/Photo.  box. box.3. Click on the Yes button when closing the window. 4. Back on the Home screen, click on  . . | |||
VIII.B List of Images Section's Columns
When unchecking the  box, you will see the three List of images section's columns:

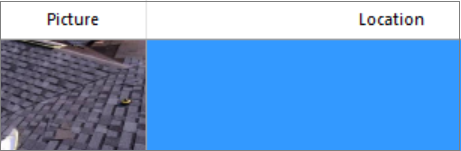
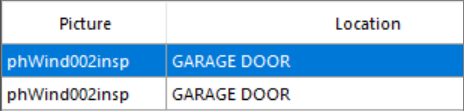
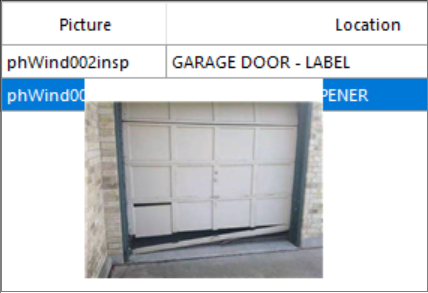
- Picture: Shows a photo series number associated with the selected image.
- Location: Shows the selected image's location.
- Path: Shows the selected image's path on your computer.
IX. Adding an Image Using Drag and drop Option
There are two methods for you to add images using the drag and drop option:
- Drag and drop into the List of images section
- Drag and drop into the Photo Caption Quick Buttons
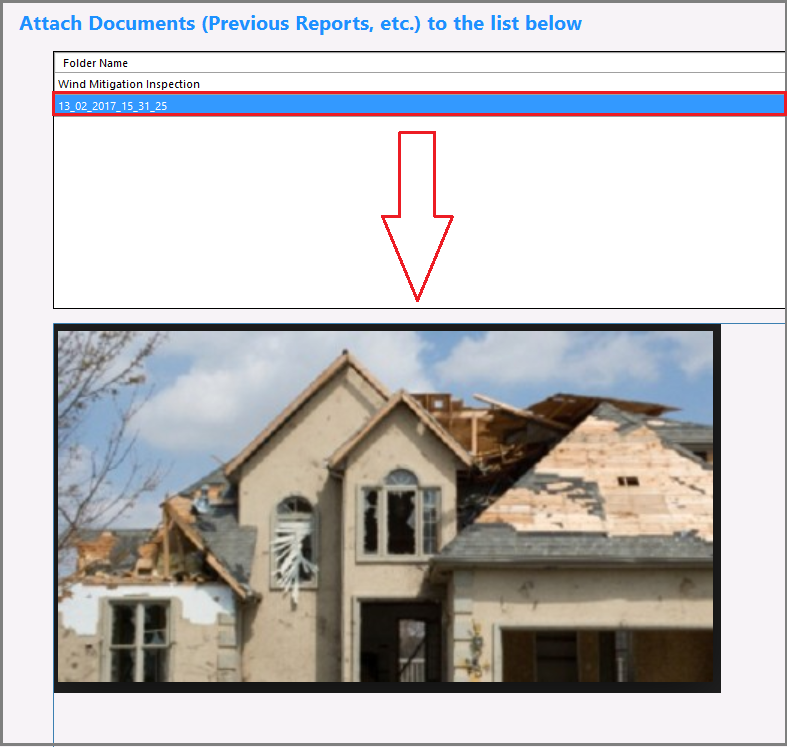
IX.A Dragging and Dropping Photos into the List of Images Section
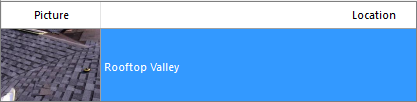
1. Select the image that you want to add from your computer; then, drag and drop it into the List of Images section.
The image will appear in the list immediately, but it will not show a location's name.
 to open the Edition window (see below).
3. Enter the location's name.

 to save it. To cancel the operation, click on
  .
.The image will show the location's name immediately.
IX.B Dragging and Dropping Images into the Photo Caption Quick Buttons
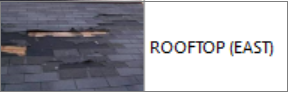
1. Select the image that you want to add from your computer; then, drag and drop it into a Photo Caption Quick Button.
The selected image will appear in the List of images section and it will show the quick button's name.
3. Select the Edit this text option.
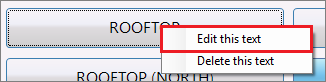
The Edition window will appear (see below).
4. Introduce the quick button's new name in the available text field.

5. Click on  to save it. To cancel the operation, click on
  .
.
The photo caption quick button will show the new name immediately.

6. Check the box to display the image's preview.
7. Click on the quick button again to link it with the image.
The selected image will show the quick button's new name.
If you want to remove the quick button's name, kindly refer to section "XVII.B Deleting a Button's Name", later in this article.
IX.B.1 Working on the Edition Window
While working on the Edition window (see above) to edit the quick button's name, you can also do the following:
a) Share a selected image with other module.
b) Add a caption on a selected image and sharing it with other module.
a) Sharing a Selected Image with Other Module1. In the Photo Caption Quick Buttons section, right-click on the button you are working with.
2. Select the Edit this text option from the menu to display the Edition window (see below).
3. Right after the quick button's name, enter the # symbol and a module abbreviation to indicate that you are sharing the selected image with other module (e. g. the Home Inspection Module, which abbreviation is HI).

4. Click on to save it. To cancel the operation, click on .
The photo caption quick button will show the abbreviation immediately.

And the selected image will be shared with the selected module.
Note: If you are working with the Home Inspection module, and would like to share photos with the Wind Mitigation Inspection Module, you just have to enter the # symbol plus the Wind Mitigation Inspection abbreviation (WIND) right after the quick button's name.
b) Adding a Caption on a Selected Image/Sharing it with Other Module
1. In the Photo Caption Quick Buttons section, right-click on the button you are working with.
2. Select the Edit this text option from the menu to display the Edition window (see below).
3. Right after the quick button's name, enter the braces ( {} ) and the caption that you want to add to the selected image.

4. Click on to save it. To cancel the operation, click on .
The quick button will register the caption.
Move your mouse over the button to visualize it.
If you want to share the captioned image with the Home Inspection module, then add the # symbol again, the HI abbreviation, and the respective area's printing code.

Click on to save it. To cancel the operation, click on .

It will also register the caption.
Move your mouse over the button to visualize it.

5. Click on the quick button again to link it with the image.
The image will show the caption immediately.
- It will also appear in the Home Inspection module's List of images section, and it will show the area's printing code plus the caption that you just shared.
Note: For the rest of the quick button's functions, kindly refer to section "XVII. Photo Caption Quick Buttons", later in this article.
X. Adding an Image Using the Camera Button
Besides adding photos using the drag and drop option, you can also add them using the camera button, but make sure that there is at least one photo in the List of images section.
1. In the List of Images section, click to highlight the Location where you want the new photo to appear.
2. Click on to display the Image Selection window if you want either to associate an existing photo from your hard drive or data storage devices, or take a new photo, if your hardware is capable.
- 3. Upload the image.
- The picture will be added to the List of Images section. It will show the same Picture series number and the same Location's name than the reference location.
To change its location's name, kindly refer to section "XII. Editing a Picture's Location Name".
XI. Duplicating an Image's Location
1. In the List of Images section, click to highlight the picture's location that you want to duplicate.
2. Uncheck the box.
3. Click on .
A new line will display in green in the List of Images section. It will show the same Picture series number and the same Location's name than the reference location, but it will not show its path since the photo was not duplicated.

3. Add it a photo by following the above mentioned steps (section "X. Adding an Image Using the Camera Button").
XII. Editing a Pictures Location Name
1. In the List of Images section, click to highlight the picture's location that you want to edit.
2. Click on to display the Edition window (see above - section "IX.A Dragging and Dropping Photos into the List of Images Section" ).
3. Make the desired changes.
4. Click on to save the edit. To cancel the operation, click on .The new picture's location name will appear on the list immediately.
XIII. Unlinking/Deleting an Image and Removing all Photos
XIII.A Unlinking an Image
1. In the List of Images section, click to highlight the picture that you want to unlink.
2. Click on to display the following menu (see below):
3. Select the Unlink photo option.
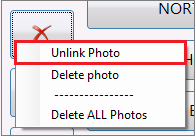
The image will disappear from the list, but its location will stay just in case that you want to link another photo on it.
XIII.B Deleting an Image
1. In the List of Images section, click to highlight the picture that you want to remove.
2. Click on to display the following menu (see below):
3. Select the Delete photo option.
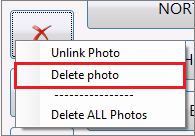
A confirmation/countdown pop-up window will appear.
3. Click on the Yes button to confirm the deletion, or click on the No button to cancel it.
XIII.C Deleting all Images
1. Click on to display the following menu (see below):
2. Select the Delete all photos option.
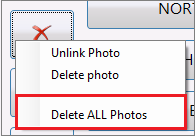
A confirmation/countdown pop-up window will appear.
3. Click on the Yes button to confirm the deletion, or click on the No button to cancel it.
XIV. Rotating an Image
1. Uncheck the Auto-Caption box.
2. In the List of Images section, click to highlight the picture that you want to rotate.
To see the image's previews, move the mouse up and down on the Picture column.
3. Click on as much as necessary until the image is to your liking.
XV. Sharing an Image with the Home Inspection Module
1. In the List of Images section, click to highlight the picture that you want to share.
2. Click on .
The selected image will appear in the Home Inspection module.
XVI. Sharing an Image with the 4 Point Insurance Inspection
1. In the List of Images section, click to highlight the picture that you want to share.
2. Click on  .
.
The selected image will appear in the 4 Point Insurance Inspection module.
XVII. Photo Caption Quick Buttons Section
This section allows you to associate your photos with default photo caption quick buttons, and edit the quick button's names as explained in section "IX.B Dragging and Dropping Images into the Photo Caption Quick Buttons".
It also allows you to add names to a blank buttons and delete button's names, as explained below. Since the buttons are editable, you can also create a personalized database via the Software Settings tool (see explanation later in this article).XVII.A Adding a Name to a Blank Button
1. In the Photo Caption Quick Buttons section, click on  to display the Edition window:

2. Enter the button's name.
3. Click on to save the addition. To cancel the operation, click on .
The photo caption quick button will show the name immediately.
XVII.B Deleting a Button's Name
1. In the Photo Caption Quick Buttons section, right-click on the button that you want to remove the name to display the options menu (see below).
2. Select the Delete this text option.
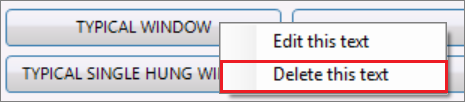
The photo caption quick button will be blank again.
XVIII. Customizing the Buttons Via the Software Settings
XVIII.A Adding a Name to the Photo Caption Buttons
1. On the Home screen's Menu bar, click on Tools> Software Settings.
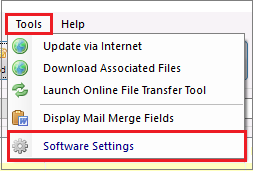
- The Software Settings window will open.
- 2. Click on Databases> Drop-down Menus to display the following window:
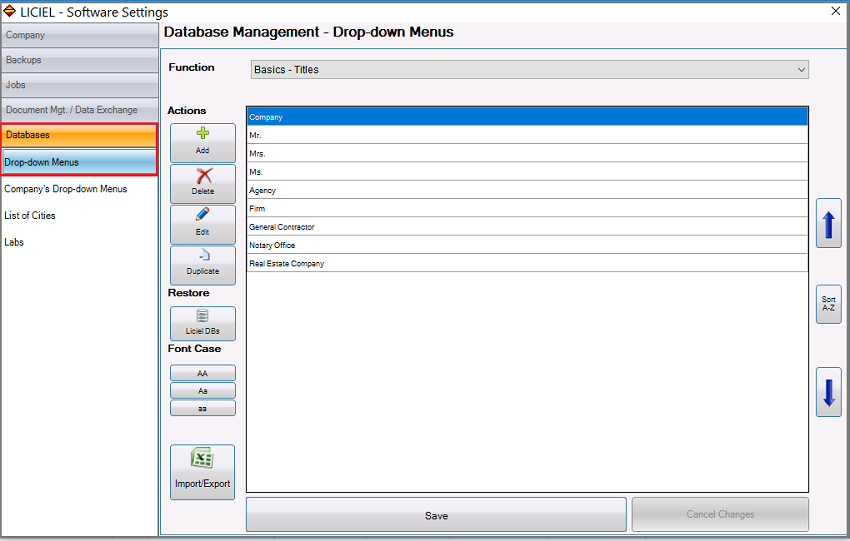
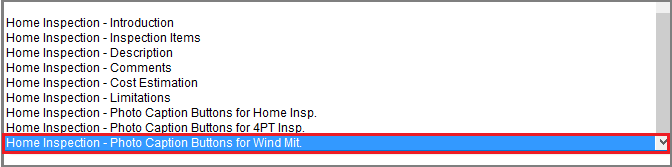
- 3. From the Function's drop-down menu, select the Home Inspection - Photo Caption Buttons for Wind Mitigation option.
3. On the following window, click on  to create a new line at the bottom of the photo caption quick buttons list.
4. Double-click on the line to display the Edition window:

5. Enter the button's name.
6. Click on to save it. To cancel the operation, click on .
7. Back on the Software Settings window, click on  .
.
The photo caption quick button's name will appear in the selected line.
XVIII.B Editing a Button's Name
1. On the Software Settings window, select the line to be edited.
2. Click on  to display the Edition window (see above).
3. Modify the text as needed.
4. Click on to save the edit. To cancel the operation, click on .
5. Back on the Software Settings window, click on .
The photo caption quick button's name will change immediately.
Note: You can also edit the button's name by double-clicking on the line to be edited to display the Edition window; then, follow the above mentioned steps (steps 3 to 5).
XVIII.C Duplicating a Button's Name
1. On the Software Settings window, click on the reference line you want to work with.
2. Click on  .
.
The duplicated button's name will appear below the reference line.
XVIII.D Deleting a Button
1. On the Software Settings window, click on the line that you want to remove.
2. Click on  .
.
A confirmation/countdown pop-up window will appear.
3. Click on the Yes button to confirm the deletion, or on the No button to cancel it.
XVIII.E Saving all Changes
1. After finishing all additions/changes/deletions on the Photo Caption Buttons for Wind Mitigation function, click on .
2. Close the Software Settings window, then click on the Yes button in the confirmation window.
Back on the Wind Mitigation Inspection's Pictures tab, all edited photo caption quick buttons will show the customization that you just done.
XIX. Attachments Tab
The Attachments tab allows you to add attachments related to the inspected property, such as PDF documents and images (bmp, jpg, jpeg, and gif formats).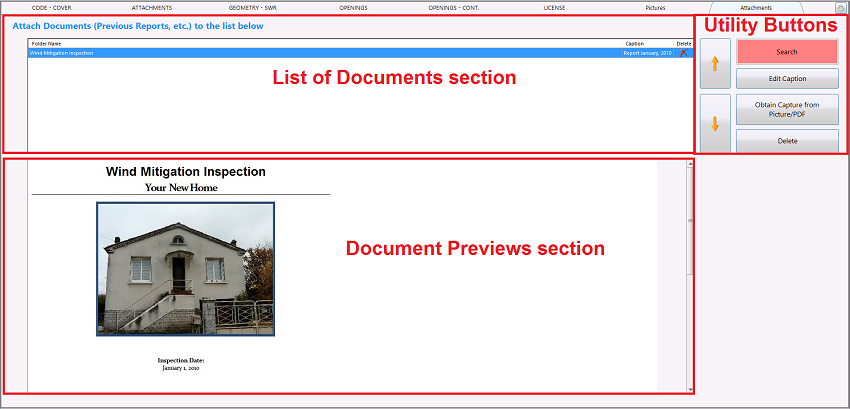
1. In the Utility Buttons section, click on  .
.
2. Select the attachment that you need to add from your computer.
3. Upload it.
The file's name will appear in the List of Documents section, and a preview of the file will display in the Document Previews section.
XIX.B Adding/Editing a Caption
1. In the List of Documents section, click to highlight the attachment you want to work with.
2. In the Utility Buttons section, click on  to display the Edition window.

3. Add/Edit the caption.
4. Click on to save the operation. To cancel it, click on .
The caption that you just added/edited will appear in the List of Documents section's Caption column.
XIX.C Adding an Screenshot from your Clipboard
1. Capture the image.
2. In the Utility Buttons section, click on  .
.
The file's name will appear in the List of Documents section, and a preview of the screenshot will display in the Document Previews section.
Note: The file's name will be the current date and time the screenshot was taken.
If you want to add a caption to the screenshot, just follow the above mentioned steps (section "XIX.B Adding/Editing a Caption").
XIX.D Deleting an Attachment
1. In the List of Documents section, click to highlight the attachment that you need to remove.
2. In the Utility Buttons section, click on  .
.
A confirmation/countdown pop-up window will appear.
3. Click on the Yes button to confirm the deletion, or click on the No button to cancel it.
You can also delete the selected attachment by clicking on this icon  in the List of Documents section's Delete column.
XIX.E Sorting the Attachments
1. In the List of Documents section, click to highlight the attachment that you need to sort.
2. In the Utility Buttons section, use the arrows  to sort it as needed.