Using the BackOffice Calendar
I. BackOffice Homepage Map
The LICIEL BackOffice is home to the shared calendar.
Allow your clients to choose an appointment date and time when they submit an order through the estimate wizard and easily manage all of your inspectors’ schedules to increase productivity.
In the LICIEL BackOffice homepage, there is a map displaying the locations of the appointments for the next two working days.
The map will be empty if there are no upcoming appointments set on the calendar for the next two working days.
To view information regarding any of the locations on the map, simply click one of the houses.
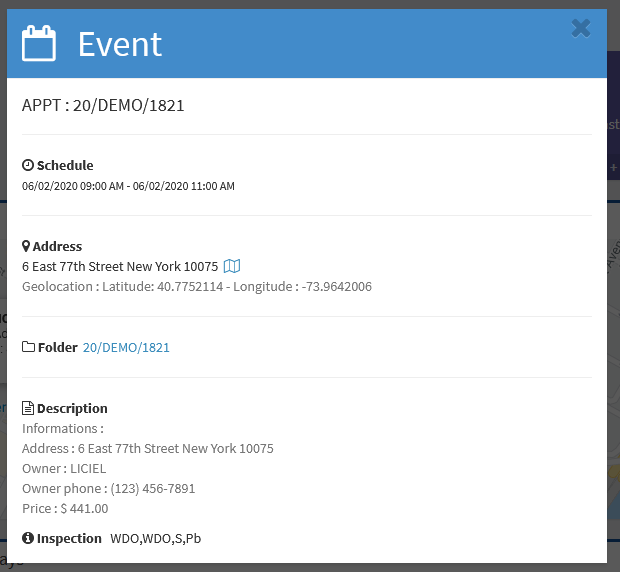
This will open a popup with information like the inspection file number, inspection file link, inspection address, and more.
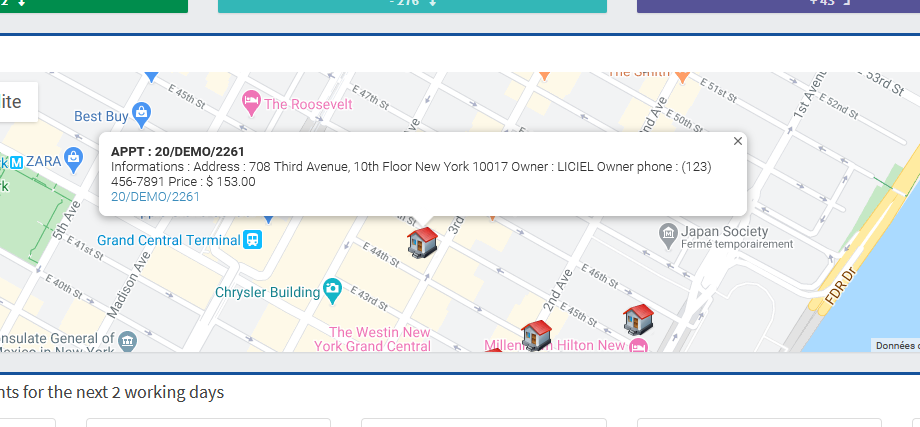
Click the inspection file link.
This will open a new tab with the inspection file.
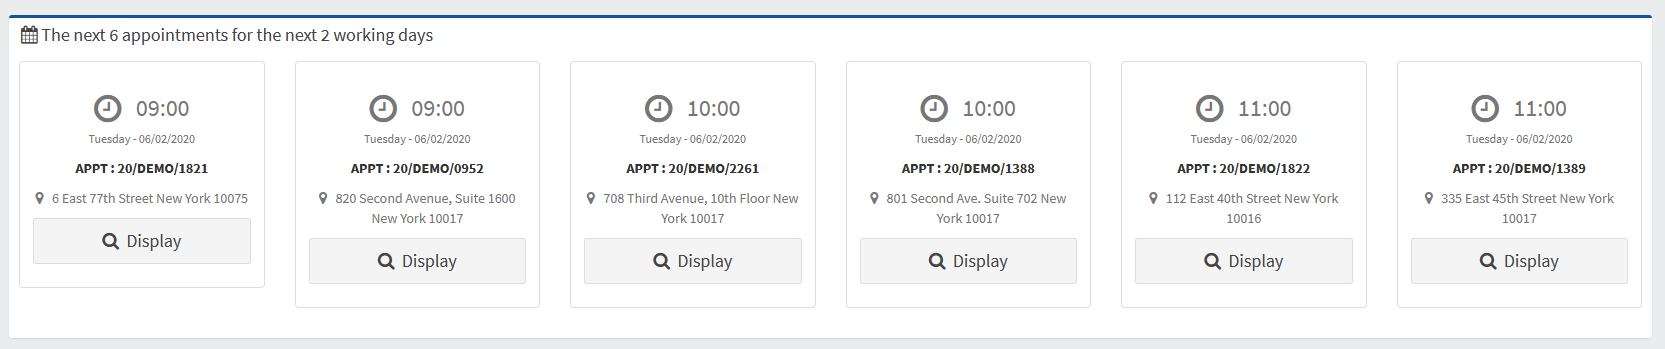
II. BackOffice Homepage Upcoming Appointments
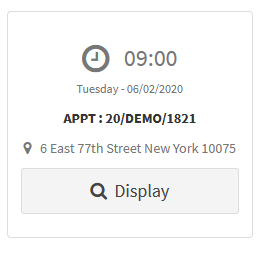
Below the map, there is a listing of the next 6 appointments for the next 2 working days.
Each listing displays the appointment date and time, the inspection file number, and the address.
Click “Display”.
A popup will open displaying important appointment information including the inspection file number, appointment date and time, and a link to the inspection file.
III. Calendar Display Settings
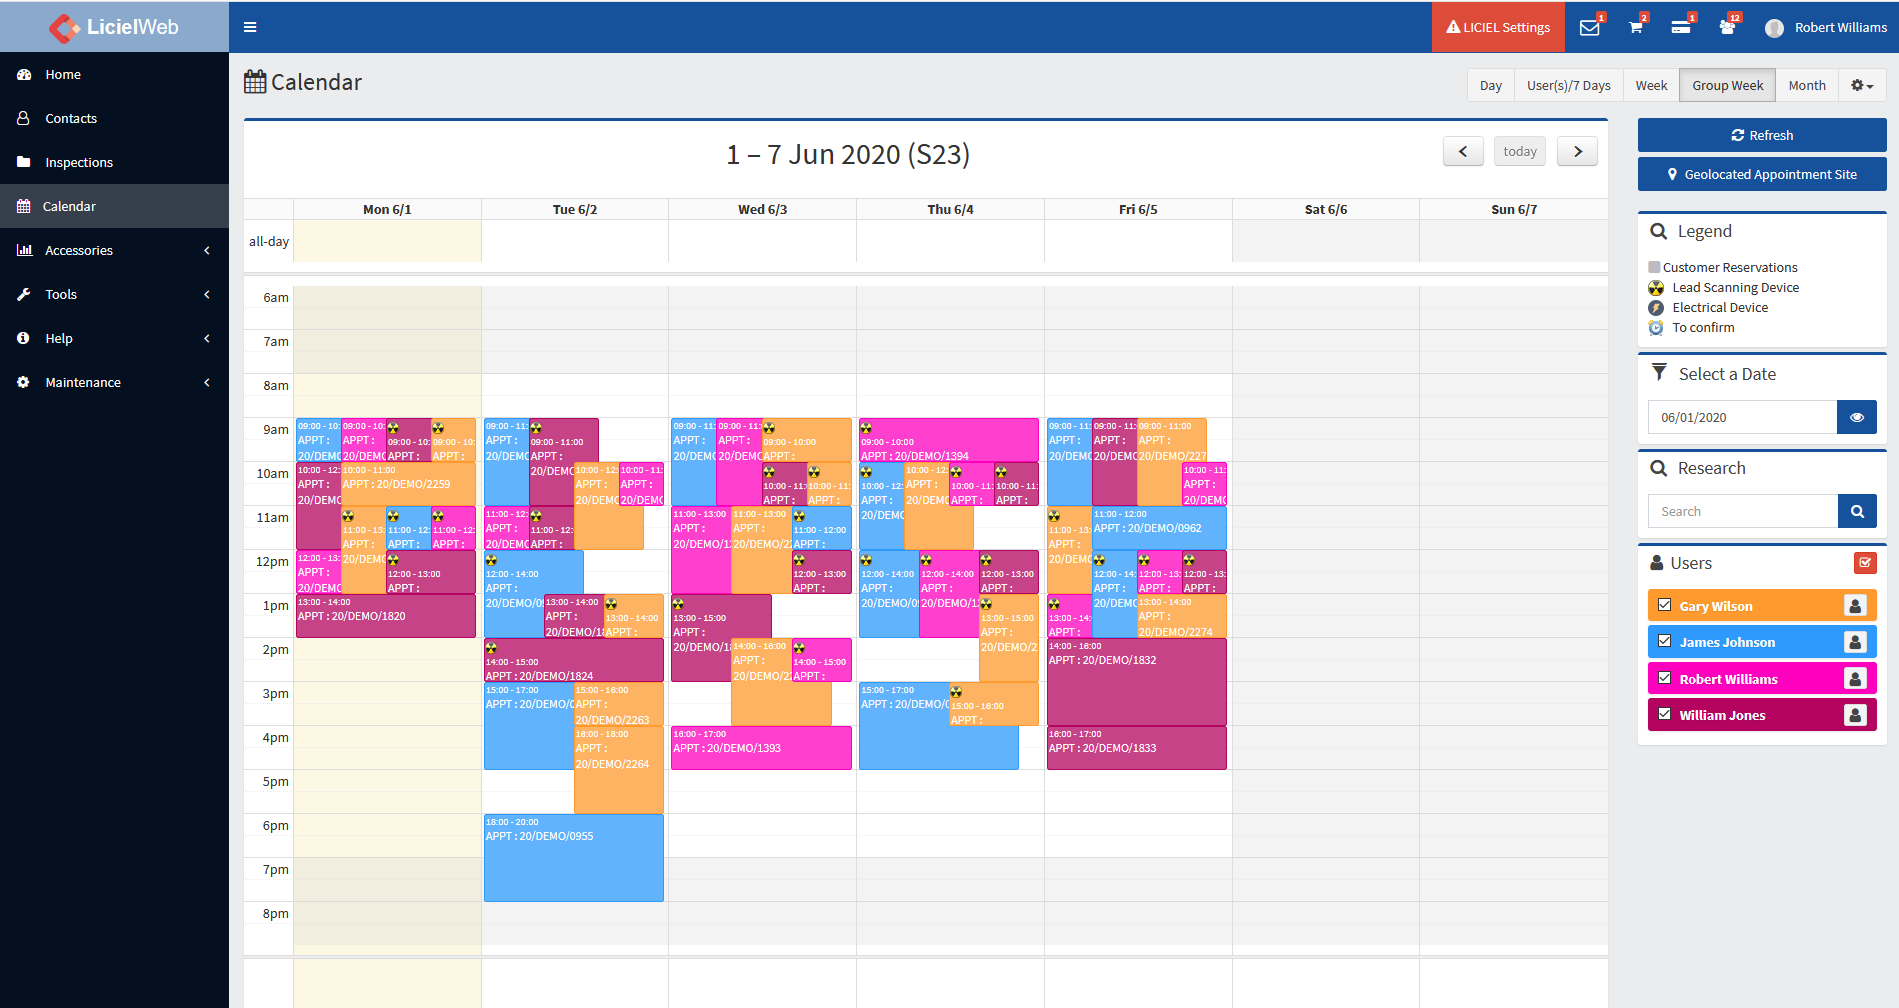
From the sidebar, click “Calendar”.
This will open the calendar to today’s date.
Use the buttons at the top to set the display preferences.
Clicking “Day” will display the inspections for today.
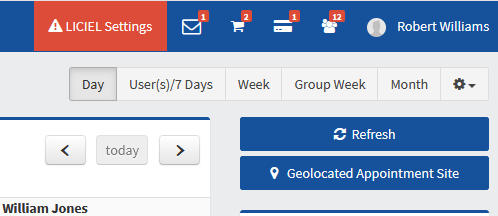
Each inspector will get their own column displaying the appointments assigned to them.
Notice that the appointment is color-coded to match the color assigned to the inspector.
For example, James Johnson is assigned the color blue, so his appointments will have a blue background.
Change the date that you are viewing by using the arrows or use the “Select a Date” box.
Choose a specific date and then click the “Eye” icon.

Test the rest of the display options to see which one works best for you.
For now, we will use the “Group Week” display.
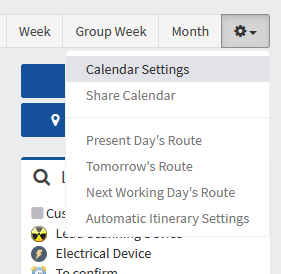
Click the gear icon to view the rest of the calendar options.
Select “Calendar Settings”.
Use the drop-down to specify what your work week looks like.
If you aren’t expecting any appointments on the weekend, use the drop-down to select “Monday Through Friday” instead of “Monday Through Sunday”.
Click “Save” to save any changes.

IV. Share Calendar
Click the gear icon again and select “Share Calendar”.
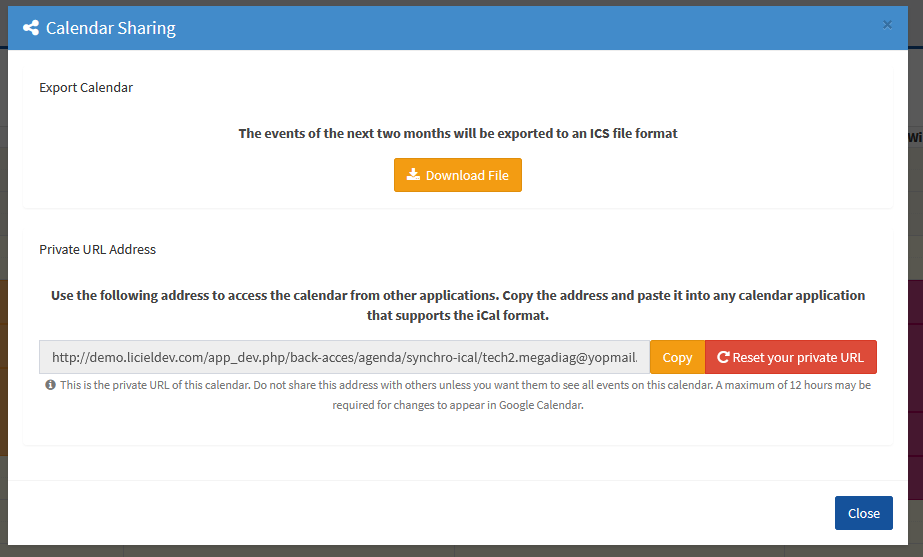
A popup will open allowing you to download a calendar file with the event for the next two months.
Click “Download File” to download this file.
The calendar file can be imported in Microsoft outlook or google calendar.
Below that you will see a link.
Anyone with this link is can download the calendar file.
To cancel this link and create a new link, simply click “Reset Your Private URL”.
People will need this NEW link to download the calendar file.
Click “Close”.
To view the most updated version of your company’s calendar, click “Refresh”.
V. Route Optimization
One of the best features of the calendar is the route optimization.
Once you enter an address, you will be able to see what the most ideal time is for the appointment.
Using the location of the address we can calculate its distance to other appointments so you can arrange appointments by proximity.
This can save you time and money!
Click “Geolocated Appointment Site” to see how this works.
Enter an address and click “Geolocate This Address” to get the location’s latitude and longitude.
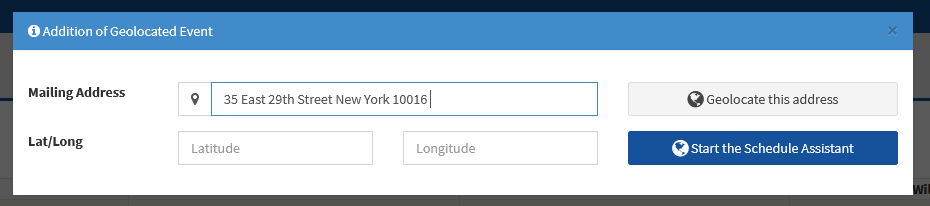
Then click “Start the Schedule Assistant”.
Notice that the appointments on the calendar have changed colors.
The colors reflect the distance of the geolocated address to the location of any appointment.
The colors go from green to yellow to orange to red to burgundy.
With green being close by and burgundy being father away.
Appointments that are green are close to the geolocated address.
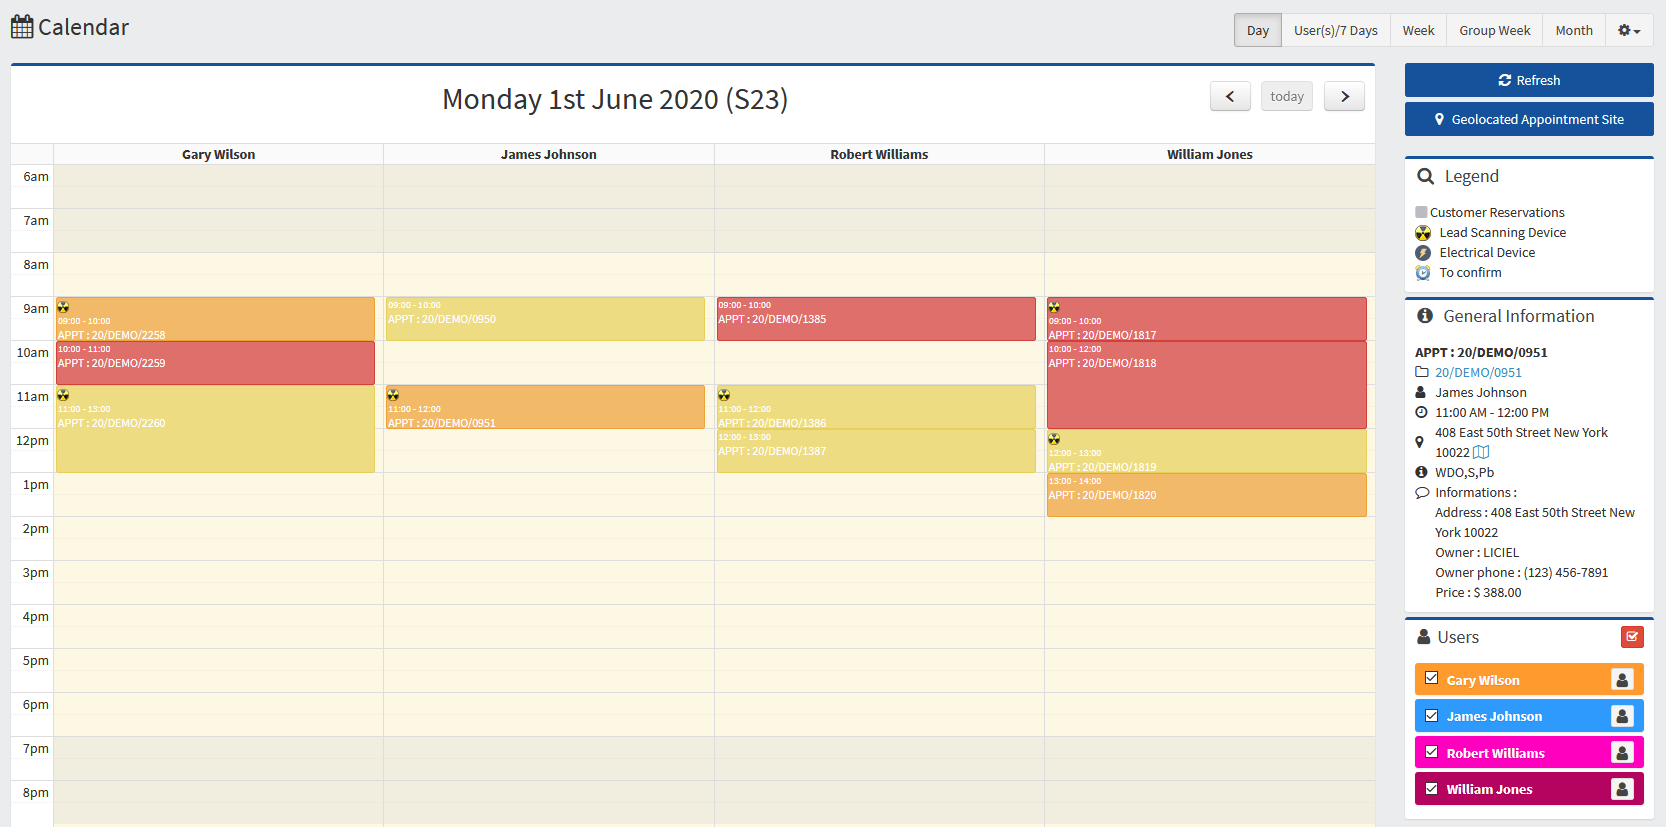
By being able to see which appointment would be close by, you can arrange your schedule accordingly to cut out unnecessary travel.
Add an appointment by clicking anywhere on the calendar.
This will open the event popup where you can enter information regarding the appointment.
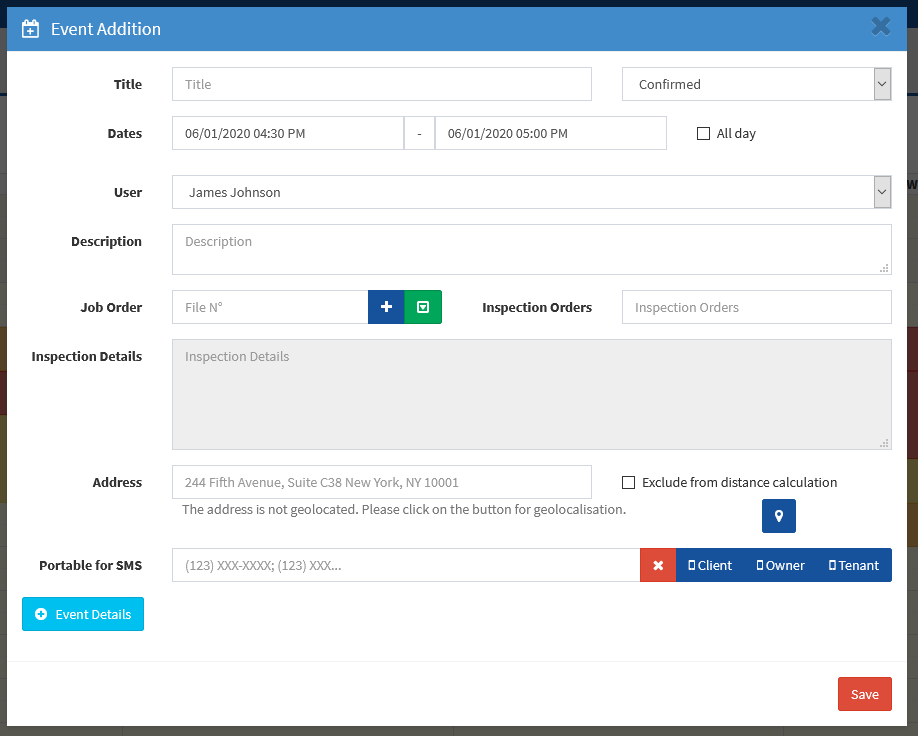
To import the information from an inspection file, enter the inspection file number.
And then click the “Insert” button.
This will add information like the address.
Select an inspector and add a title for the event.
Then, click “Event Details” to see more options.
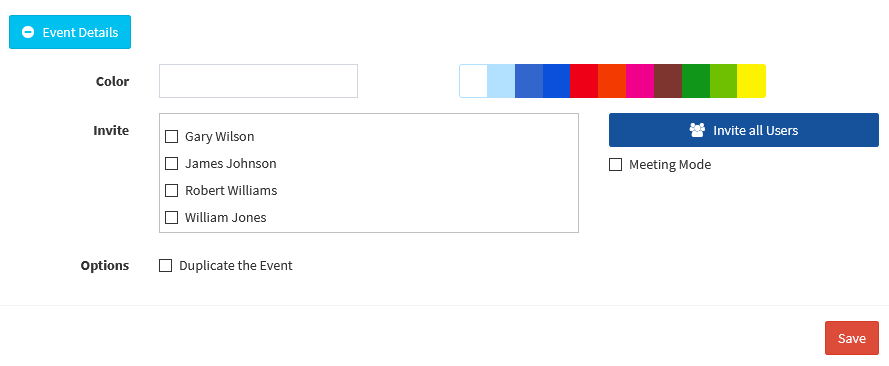
If you would like to set a different color for this appointment, use the color options here.
Invite other inspectors if the inspection requires multiple inspectors.
Check the checkboxes for the inspectors you would like to invite.
Doing this will create an event on the calendar for each inspector.
Click “Save”.
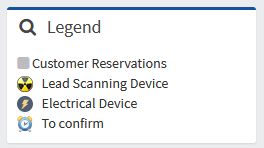
VI. Calendar Legend
Use the calendar legend to view the meaning of each color or symbol on the calendar.
VII. Calendar "Select a Date"
To view a specific date on the calendar, use the select a date box.
VIII. Calendar "Research"
You can also search for a specific appointment use the research box.
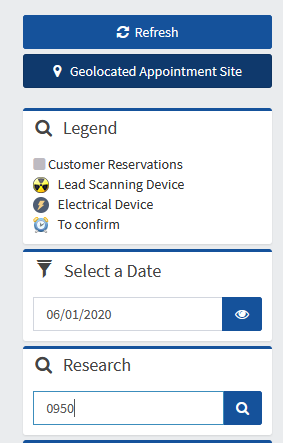
Enter any information related to the inspection file.
This can be the inspection file number or the owner, client, tenant name or email address.
Click the search icon.
This will return the search results.
If there is an appointment matching the search query, it will be displayed here.

Notice that you can see the appointment date and time as well as the inspector assigned to the inspection.
To see the inspection file for this appointment, click the inspection file link.
Edit the appointment by clicking the “Edit” icon.
IX. Calendar "Users"
The “Users” box on the right side of the screen displays all of the inspectors.

The inspectors that appear in this list can be found in the BackOffice settings under “Users”.
To display the appointments for a particular inspector, ensure that only the checkbox for that inspector is checked.
To view all of the inspectors again, use the “Check All“ icon.
X. Appointment "General Information"
Last but not least, hover over an appointment on the calendar.
Notice that a “General Information” box is now visible in the calendar sidebar.
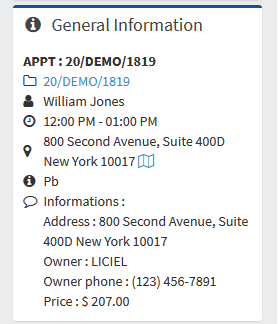
The general information box displays information regarding this appointment including the inspection file number and a link to it, the appointment date and time and more.
Click any event on the calendar.
This will open a popup with the appointment details.
Click the printer icon to print the appointment information.
To permanently delete the appointment from the calendar, click “Delete Event”.
Edit any details, including appointment date and time by clicking the “Modify Event” button.